
QUICK ANSWER
- The process: waterproof, set mesh-backed pebble sheets in thinset, let it cure, seal, grout, then seal again
- Floors and walls use the same steps, but walls need a non-sag thinset, a level support board, and small working sections
- Waterproofing is required in any shower, never optional
- Timing: allow roughly 24 to 48 hours for the thinset to cure before sealing and grouting, and follow the product instructions
- DIY difficulty: moderate with mesh sheets; hire a professional for waterproofing if you have no tile experience
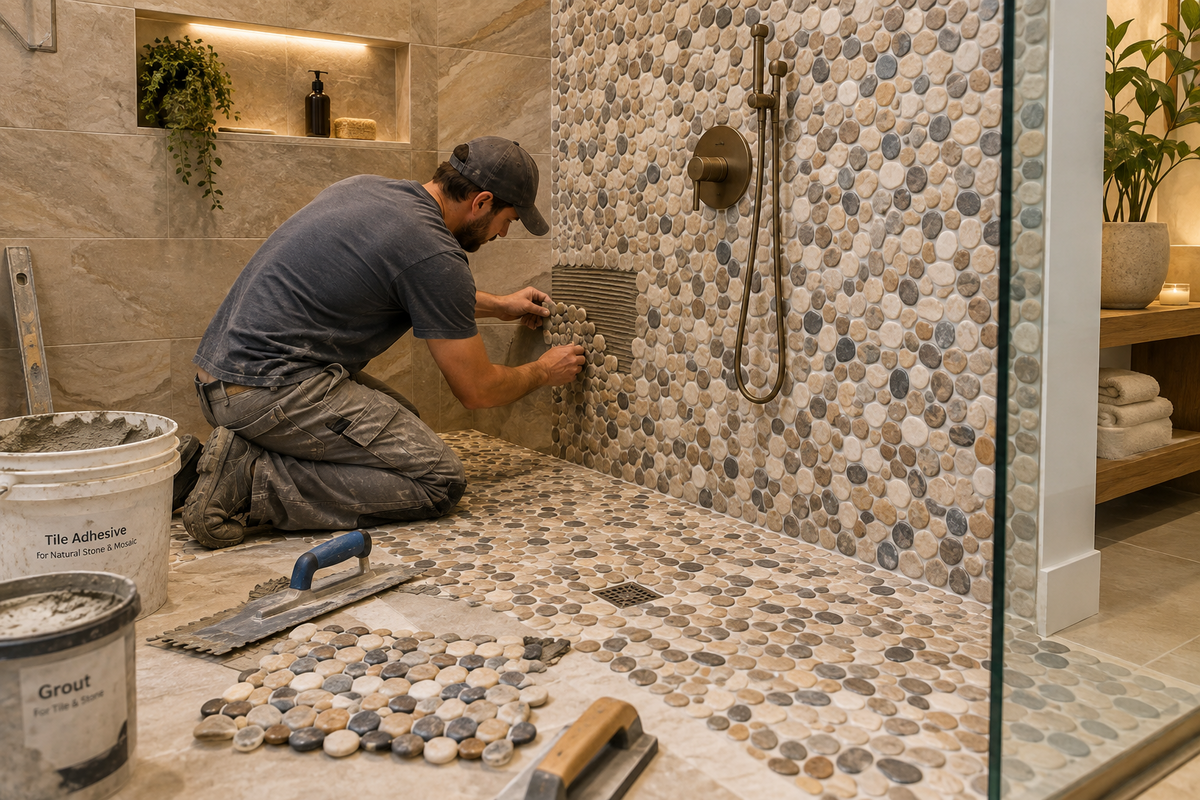
Pebble tile turns a shower into something closer to a spa: a textured natural floor underfoot, or a wall that looks like a riverbed. Installing it is more manageable than it looks, because the stones come pre-arranged on mesh sheets that set like any mosaic tile. The details matter more than the difficulty, though. Pebble sheets are heavy, the surface is uneven, and the joints between stones are wide, which changes how you set, seal, and grout them. This guide covers pebble tile installation for both shower floors and shower walls, and it points you to a step-by-step floor guide when you want the full detail on that part.
Shower Floor vs. Shower Wall: What Changes
Why Choose Pebble Tile for a Shower?
- Natural look: every sheet is sorted from natural stone, so no two showers look the same
- Traction: the uneven surface gives a floor real grip when wet
- Durability: natural stone holds up to daily use for years when it is sealed and maintained
- Comfort: the rounded stones give a gentle, massaging feel underfoot
- Flexibility: it works on floors, accent walls, niches, and borders, in many colors
If you're still deciding whether pebble is right for your shower, our pebble tile shower floors pros and cons guide weighs the tradeoffs, and our pebble tile cost guide breaks down what a project really costs.
Tools and Materials
Materials
- Pebble tile sheets, plus 10 to 15 percent extra
- Waterproofing membrane for the shower
- Polymer-modified thinset (non-sag for walls)
- Penetrating stone sealer
- Grout (sanded for wide joints, or epoxy)
- 100 percent silicone caulk for corners and joints
- Painter's tape
Tools
- Notched trowel (size per the sheet and thinset instructions)
- Rubber grout float
- Rubber mallet and flat board
- Level and a straight board for a support ledger
- Tile nippers or a wet saw
- Sponges, buckets, and clean cloths
- Gloves, goggles, and knee pads
Prepare the Shower First
WATERPROOFING IS REQUIRED
Tile and grout are not waterproof on their own. A shower needs a continuous waterproofing membrane under the tile on the floor and walls, connected at the corners and the curb. Skipping it is the most expensive mistake in a shower build, because the damage is hidden until the repair is large. Follow the membrane manufacturer's instructions exactly.
- Remove old tile and clean up. Take everything down to a sound, stable surface and clear dust and debris.
- Repair the substrate. Fix cracks and uneven spots. Walls should be flat and solid, typically cement board.
- Check the floor slope. A shower floor should fall about 1/4 inch per foot toward the drain.
- Apply the waterproofing system and let it cure as directed before setting any tile.
Plan Your Layout
- Measure the area and add 10 to 15 percent for cuts and waste
- Open several boxes and mix sheets as you go, since stone color varies between sheets
- Dry-lay a few sheets to see how the edges interlock and where the pattern lines up
- On walls, snap a level line for your first row, then plan cuts around the niche, valve, and corners
- Plan how the pebbles will meet the drain, so you know where to nip individual stones
How to Install Pebble Tile on a Shower Floor
- Protect the drain. Cover it with painter's tape so thinset and grout can't fall in, and tape the walls just above the tile line.
- Spread thinset. Starting in the back corner, spread a thin layer with the flat side of the trowel, then comb ridges with the notched side. Work about three sheets at a time.
- Set the first sheet. Press it firmly into the thinset and check that the stones make full contact.
- Continue toward the entrance, interlocking the edges so the seams disappear into the random pattern.
- Cut around the drain. Use nippers to remove individual stones, or a wet saw for cleaner sheet cuts.
- Level the surface. Lay a flat board across the sheets and tap it lightly with a mallet so the stones sit evenly.
That is the short version. For the full floor process, including tools, cutting around the drain, and how to remove a pebble floor later, see our step-by-step pebble tile shower floor installation guide.
How to Install Pebble Tile on Shower Walls
Walls are where most DIYers hesitate, and the concern is fair. Gravity works against heavy stone sheets before the thinset sets. These steps keep everything where you put it.
- Snap a level line and add a support board. Screw a straight, level board along the bottom of your first row. It carries the weight of the sheets while the thinset cures. Remove it before grouting and fill the last row.
- Use a non-sag thinset. Choose a polymer-modified thinset rated for vertical use with heavy tile, and mix it to the thickness on the bag.
- Work in small sections. Spread thinset on a patch about one to two sheets wide and comb it in one direction. Large sections skin over before you can set the tile.
- Press sheets into place. Start with the bottom row on the support board, press firmly, and work upward. Make sure the stones make full contact with the thinset, which matters even more in a wet area.
- Hold the sheets while they set. Strips of painter's tape across the sheets help stop them drifting. Check for sliding after a few minutes and adjust while the thinset is still workable.
- Keep the pattern continuous. Interlock sheet edges and nudge individual stones so the seams read as one surface.
- Cut around fixtures. Use nippers around the valve, niche, and corners, and leave a small gap at inside corners for caulk.
- Let it cure fully. Leave the wall undisturbed for the time on the thinset package, then remove the support board.
PRO TIP: LIGHTER STONES SIT EASIER ON WALLS
Flatter, sliced stones are easier to set on a wall than tall rounded pebbles, because they sit closer to the surface and put less weight on the thinset. Our sliced pebble tile and standing pebble tile collections are built with walls and accents in mind.
Seal, Grout, and Seal Again
Sealing and grouting work the same on a floor and a wall.
- Seal before grouting. Once the thinset has cured and the stones are clean and dry, apply a penetrating sealer for natural stone. This keeps grout from staining the stones.
- Mix and apply the grout. Pebble joints are wide and irregular, so sanded grout is a common choice, and epoxy grout is worth considering in a wet shower for stain resistance. Press it into every gap with a rubber float held at about 45 degrees. See our pebble tile grouting guide and our sanded vs unsanded grout guide for more.
- Clean as you go. After 15 to 30 minutes, wipe the surface in a circular motion with a damp sponge, rinsing often. Be careful not to pull grout out of the joints.
- Remove haze. Once the grout has cured, buff off any haze with a soft dry cloth.
- Caulk the corners. Use 100 percent silicone, matched to the grout color, at inside corners, where the wall meets the floor, and at the curb. These joints move, and grout in them will crack.
- Apply the final sealer over the stones and grout once the grout has fully cured, following the product's directions. Browse our sealers, and see our pebble shower sealing guide for the schedule.
Troubleshooting Common Problems
Caring for a Pebble Tile Shower
- Clean regularly with a pH-neutral cleaner made for natural stone
- Avoid harsh acidic cleaners, which wear down sealer and etch stone
- Reseal about once a year, or on the schedule your sealer recommends
- Run the fan or leave the door open after showering to reduce lingering moisture
- Fix loose stones promptly, before water gets behind them
Design Ideas for Pebble Tile in a Shower
- Pebble floor, large-format walls: the classic combination, with texture underfoot and clean lines above
- Accent wall: one pebble wall behind the showerhead as a focal point
- Half-height pebble wall: pebble below a border line, with smooth tile above
- Lined niche: a small area of pebble inside a shower niche for texture at low cost
- Border strip: a band of pebble framing the floor or a wall
Featured Pebble and Stone Mosaic Tiles
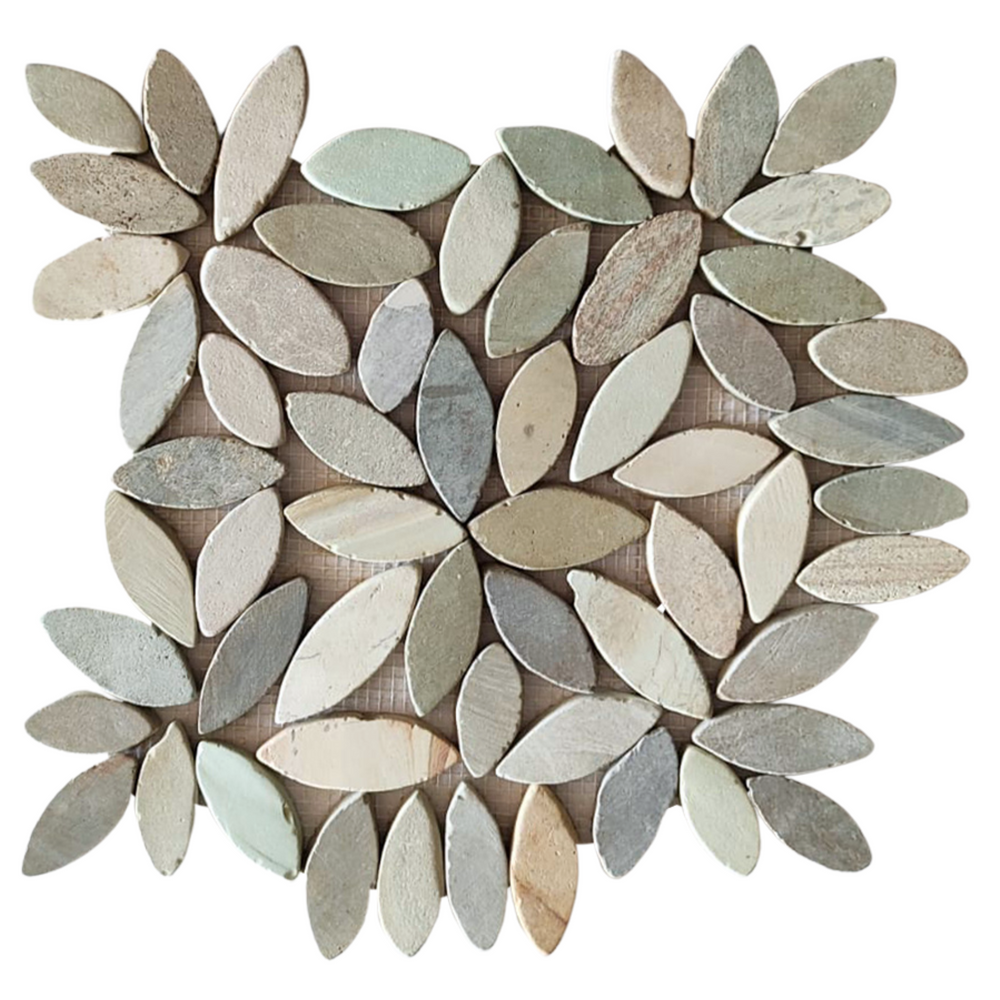
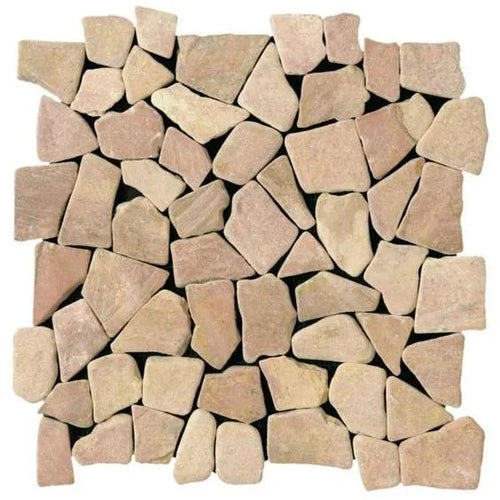
A few options that suit shower walls and floors. Open any product for current pricing and sizes.
Browse the full pebble tile collection
DIY or Hire a Professional?
- DIY works well if you've tiled before, the substrate and waterproofing are already in place, and you're doing an accent wall, niche, or a small floor
- Hire a professional for waterproofing, a curbless shower, a complicated drain, or any project where a mistake would be hidden behind the tile
- A good compromise: have a professional handle waterproofing and slope, then set, seal, and grout the pebble yourself
Frequently Asked Questions
Can you install pebble tile on shower walls?
Yes. Use a waterproofed wall surface, a non-sag polymer-modified thinset, a level support board, and small working sections so the heavy sheets stay in place while the thinset sets.
Is installing pebble tile on a wall harder than on a floor?
Slightly, because gravity works against the sheets before the thinset cures. The floor's challenge is slope and drainage. With the right thinset and a support board, a wall is very manageable.
What thinset should I use for pebble tile?
A polymer-modified thinset suits floors, and a non-sag version is better for walls. Check the sheet and thinset instructions for the right trowel size, and use a product rated for natural stone.
Do I need to seal pebble tile before grouting?
Yes. Sealing the stones first keeps grout from staining them and makes cleanup easier. Seal again after the grout has fully cured.
How long should I wait before grouting?
Usually 24 to 48 hours for the thinset to cure, plus time for the sealer to dry. Always follow the instructions on your specific thinset and sealer.
What grout works best for a pebble shower floor?
Sanded grout is common because the joints are wide, and epoxy grout is a stronger stain-resistant choice for a wet shower. See our pebble tile grouting guide.
Is a DIY pebble shower floor realistic?
For someone with basic tile experience, yes, especially with mesh-backed sheets. Waterproofing and slope are the parts worth getting right or having a professional do.
What is the difference between sheet-mounted and loose pebbles?
Sheet-mounted pebbles come pre-arranged on mesh and install like mosaic tile. Loose pebbles are set stone by stone, which takes much longer and is harder to keep level, so sheets are the practical choice for most homeowners.
Can I install pebble tile over existing tile in a shower?
It's generally not recommended in a shower, because you need correct slope and a proper waterproofing layer, which an existing tile surface can't give you. Removing the old tile and starting from a prepared substrate is the safer route.
How do I remove a pebble tile shower floor?
It's done in sections with a chisel and hammer, working carefully to protect the waterproofing beneath. Our shower floor installation guide covers removal.
Conclusion
Pebble tile installation comes down to a few fundamentals: waterproof first, set the sheets with the right thinset, seal before and after grouting, and caulk the joints that move. Walls add a few extra precautions, mainly a non-sag thinset, a support board, and smaller sections. Get those right and a pebble shower, whether a floor, an accent wall, or both, gives you a surface that looks natural, lasts for years, and feels like a spa every time you use it.
Ready to start your project? Pebble Tile Shop carries natural, sliced, mini, and standing pebble tile, plus the sealers to protect it, and you can order samples first to see the stone in your own light.
Ready to tile your shower? Browse our full pebble tile collection.
Shop Pebble Tile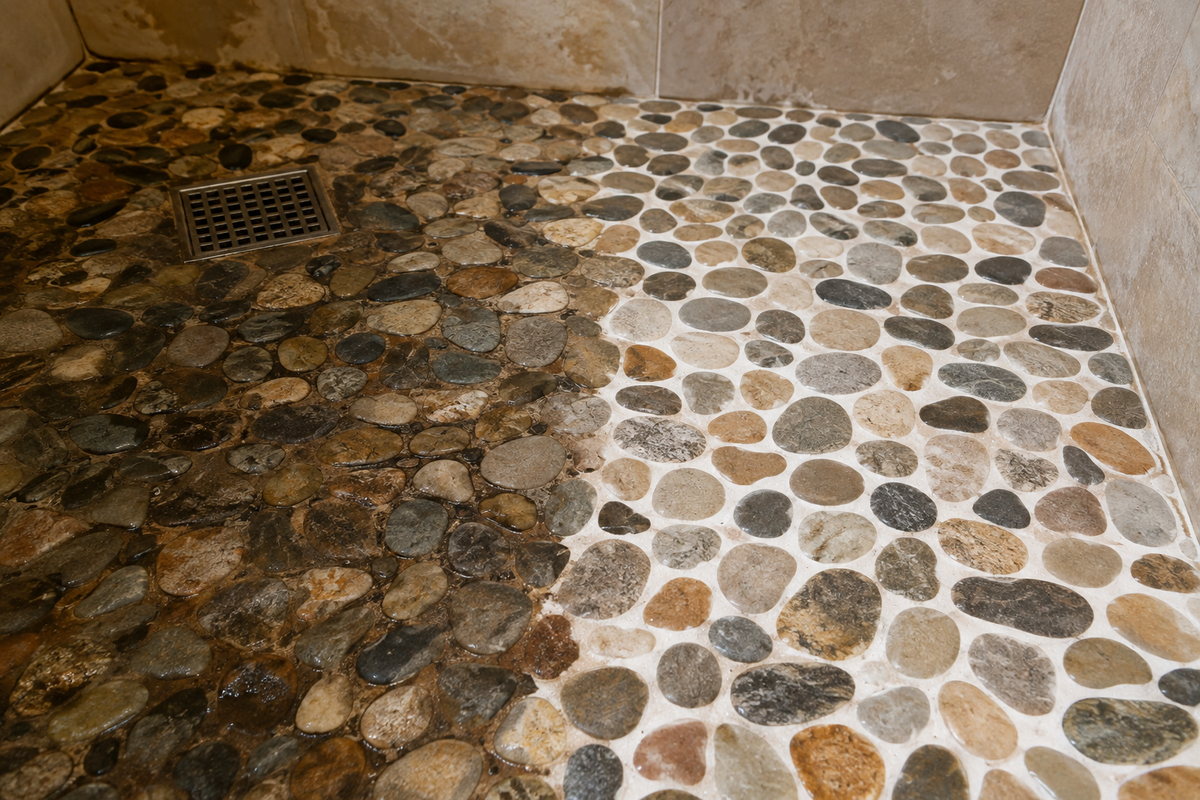

Leave a comment
This site is protected by hCaptcha and the hCaptcha Privacy Policy and Terms of Service apply.