
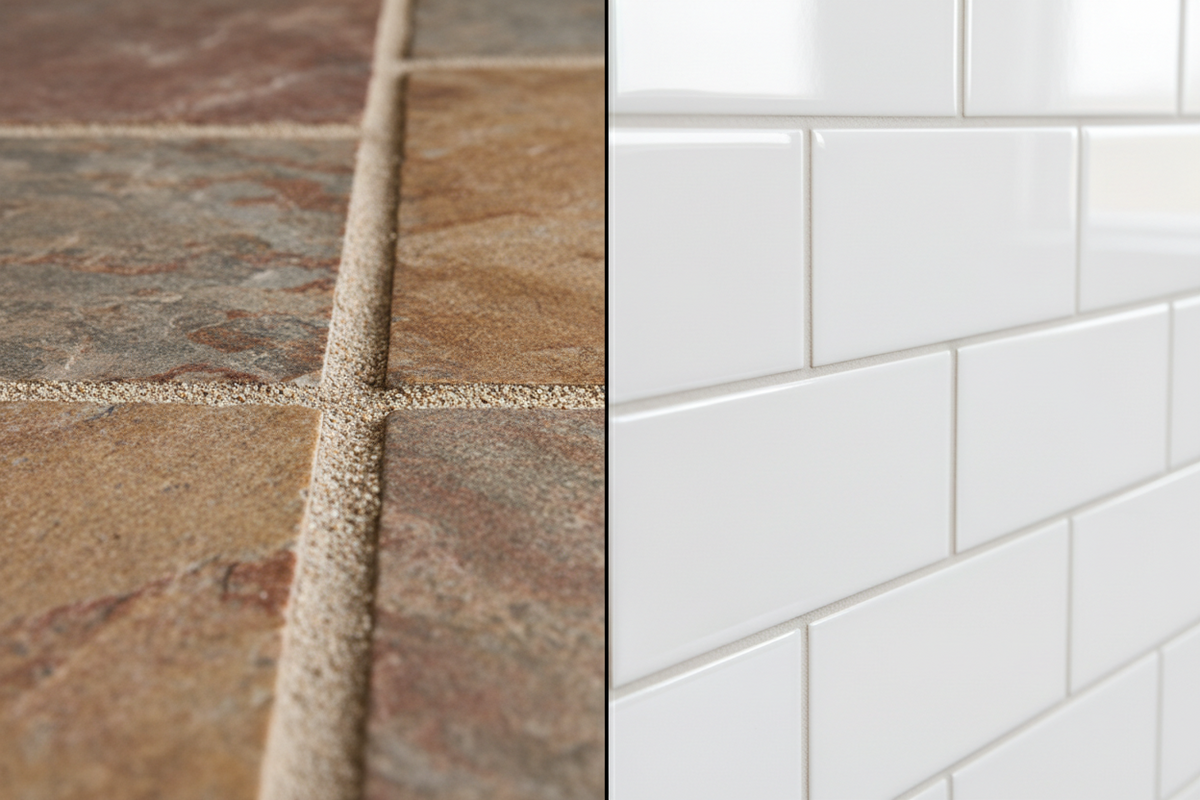
Use sanded grout for grout lines 1/8 inch (3mm) or wider and for floors, since the sand adds strength and resists shrinkage under weight. Use unsanded grout for joints narrower than 1/8 inch and for delicate or polished surfaces like glass, polished marble, and some porcelain, since it won't scratch the tile face during application.
If you have ever stood in the grout aisle staring at two nearly identical bags, one labeled sanded and one labeled unsanded, you already know how confusing this decision can feel. It looks like a small detail. It isn't. The wrong choice here shows up months later as cracked grout lines, scratched glass tile, or a shower floor that starts crumbling at the edges. The right choice, made once at the start, means you never think about your grout again.
This guide walks through exactly when to use sanded grout and when to use unsanded, room by room and material by material, along with the special cases that trip people up most: shower walls versus shower floors, porcelain tile, glass tile, and natural stone. We'll also cover modified versus unmodified grout, epoxy as a third option, real application technique, and the maintenance differences that affect how your tile looks five years from now, not just on installation day.
What Sanded and Unsanded Grout Actually Are
Sanded grout is Portland cement mixed with fine silica sand, water, and additives. The sand is what gives it strength and keeps it from shrinking significantly as it cures, which is exactly what you want in a joint that has to bear weight or resist cracking under pressure. It has a slightly gritty texture once dry, and it's typically the choice for joints 1/8 inch or wider.
Unsanded grout skips the sand and relies on Portland cement, water, and non-sand additives to form a smoother, more paste-like consistency. Without sand, it can be worked into tight, narrow joints where sanded grout would struggle to pack in cleanly. It's also less likely to scratch a delicate tile surface during application, which is the main reason it's the standard choice for glass, polished stone, and some porcelains.
Neither type is objectively "better." They're built for different jobs, and using the wrong one in the wrong place is where almost every grout complaint you'll find online actually starts.
Key Differences Between Sanded and Unsanded Grout
Strength and durability. Sanded grout's sand particles provide structural support that helps it withstand pressure without cracking, which is why it's the standard for floors. Unsanded grout has less compressive strength and is more prone to cracking if it's used in wider joints or areas under regular weight and pressure.
Joint width. This is the single biggest factor in the decision. Sanded grout works best at 1/8 inch (3mm) and wider, where the sand prevents excessive shrinkage. Unsanded grout is built for joints narrower than 1/8 inch, where sand would make it difficult to pack the joint cleanly.
Application feel. Sanded grout is grittier and takes more effort to push into joints and clean off the tile face. Unsanded grout has a smoother, more butter-like consistency, which is part of why it's often preferred on vertical wall surfaces.
Shrinkage during curing. Sanded grout shrinks less because the sand helps maintain volume as the water evaporates. Unsanded grout shrinks more, which is exactly why it's not recommended for wide joints, where that shrinkage would show up as visible gaps or cracking.
Scratch risk. Sanded grout's abrasive sand particles can scratch delicate surfaces like polished marble, some ceramics, and glass during installation. Unsanded grout carries essentially no scratch risk, which is why it's the safer default for anything with a polished or soft finish.
Cost. Sanded grout is typically the less expensive option per bag, generally in the range of $15 to $30 for a 25 pound bag, since sand is a cheap filler. Unsanded grout usually runs a bit higher, often $18 to $35 per 25 pound bag, though for narrow-joint jobs you'll typically use less material overall, so the real-world cost difference on a residential project is usually small. Prices vary by brand and region, so treat these as general ranges rather than exact quotes.
PRO TIP — MEASURE YOUR JOINT FIRST
Before you buy anything, measure your actual grout joint width with a tape measure or a spacer you already used during installation. If you're right at the 1/8 inch line, lean toward sanded for floors and unsanded for walls, since load-bearing and scratch risk matter more than the width alone at that borderline.
When to Use Sanded Grout
Sanded grout is the right call for most floor installations. Floors carry weight and foot traffic, and the added strength keeps the grout from cracking under that pressure over time. That covers kitchen floors, bathroom floors, entryways, living areas, commercial spaces, and outdoor patios.
Beyond floors, reach for sanded grout any time your joints are 1/8 inch or wider, in high-traffic areas that see constant pressure, on shower floors specifically (not walls, which we'll get to), and for most outdoor installations, where its added strength helps it hold up better against temperature swings and weather exposure.
When to Use Unsanded Grout
Unsanded grout is the better fit for narrow grout lines under 1/8 inch, where its smooth consistency lets it fully penetrate a tight joint without the sand getting in the way. It's also the standard choice for wall tile installations generally, since walls don't bear weight the way floors do and most wall tile is set with narrower joints to begin with.
Reach for unsanded grout with any tile that scratches easily: glass, polished marble, limestone, metal tile, and some polished porcelains. Bathroom wall tile and kitchen backsplashes both tend to combine narrow joints with decorative or delicate tile,ofteny unsanded is the more common choice in both spaces.
Sanded vs Unsanded Grout for Grout or Shower: Walls and Floors Are Different Decisions
This is where most of the confusion actually lives, because a shower isn't one surface, it's at least two, and they don't need the same grout.
Shower floors should almost always get sanded grout, for the same reason any floor does. They take direct pressure from standing and foot traffic, and shower floor tile is often small format (like mosaic or pebble tile) with joints that tend to run 1/8 inch or wider, which plays directly to sanded grout's strengths.
Shower walls are a genuinely closer call. They don't bear weight, but they do sit in a high-moisture environment full time. The decision comes down to two things: joint width and tile material. If your shower wall tile has joints 1/8 inch or wider, sanded grout still gives you better structural support and shrinkage resistance. If you're working with glass or polished stone wall tile, unsanded is the safer choice to avoid scratching, regardless of joint width. For standard ceramic or porcelain wall tile with moderate joint widths, either type technically works. Still, unsanded is often preferred for its smoother finish and easier application on a vertical surface.
The most common mistake in a shower is picking one grout type for the entire space because it's "the shower." Walls and floors are different surfaces with different loads and often different tile, and they can genuinely need different grout. Decide separately for each.
Sanded vs Unsanded Grout for Porcelain Tile
Porcelain is durable enough to handle either grout type structurally, so the decision here comes down to finish and location rather than the material's strength. Unpolished porcelain floor tile typically does best with sanded grout, since it's a floor application and the matte surface has no meaningful scratch risk. Highly polished porcelain, on the other hand, can be scratched by sanded grout's abrasive particles during application, so unsanded is the safer choice there even on a floor, especially in a joint under 1/8 inch. For porcelain wall tile, follow the same logic as the general wall guidance: narrower joints and decorative finishes usually point to unsanded.
Sanded vs Unsanded Grout for Glass Tile
Glass tile installations should almost always use unsanded grout. The sand particles in sanded grout can permanently scratch a glass surface during installation, and you can't polish that damage out afterward. Glass tile is also typically installed with narrow joints, which plays to unsanded grout's strengths anyway. If you're working with an unusually wide joint on glass tile, which is uncommon, check with a grout manufacturer or installer about a specialty product rather than defaulting to standard sanded grout.
Sanded vs Unsanded Grout for Natural Stone
Natural stone, including marble, travertine, slate, limestone, and the pebble and stone mosaic tile many homeowners use in showers and floors, needs a closer look at finish before you decide. Polished stone can be scratched by sanded grout the same way glass can, so if your stone has a polished or honed finish, lean toward unsanded even if the joint is on the wider side, and accept the small tradeoff in structural strength. For most natural stone floor installations with standard joint widths and a matte or tumbled finish, sanded grout provides the durability the application calls for.
Modified vs Unmodified Grout
Separately from sanded versus unsanded, you'll also see grout labeled modified or unmodified, and this decision layers on top of the first one rather than replacing it.
Modified grout contains polymers and latex additives that improve flexibility, adhesion, and water resistance. That flexibility matters in spaces with temperature swings or constant moisture, which is most of what tile gets installed in. Unmodified grout is the traditional option without those additives. It's usually cheaper but often needs a separate sealer applied afterward to get comparable water resistance.
Both sanded and unsanded grout come in modified and unmodified versions. For most modern residential projects, especially bathrooms, kitchens, and outdoor areas, modified grout is worth the extra cost.
Epoxy Grout: The Premium Third Option
Epoxy grout isn't cement-based at all. It's made from epoxy resins and hardeners, and it comes in both sanded and unsanded formulations, so it doesn't replace the sanded-versus-unsanded decision; it sits alongside it as a material upgrade. Epoxy grout offers noticeably better stain resistance, doesn't require sealing, and is essentially waterproof, which makes it a strong option for shower floors and commercial kitchens where moisture exposure is constant. The tradeoffs are real: it costs significantly more than standard grout, and it's harder to work with, since it sets faster and has a shorter working window before it becomes difficult to clean off the tile face.
How to Apply Sanded and Unsanded Grout Correctly
Getting the right type of grout is half the job. Application technique is the other half, and it's where many otherwise correct grout choices go wrong.
Working with sanded grout:
- Mix thoroughly so all the powder is fully incorporated. Dry pockets become weak spots later.
- Let the mixed grout sit for 5 to 10 minutes (slaking) before you apply it, which allows the additives to activate fully.
- Work in manageable sections, typically 10 to 15 square feet at a time, so the grout doesn't start setting before you've cleaned it.
- Use firm pressure to pack the grout completely into the joints and avoid leaving voids underneath the surface.
- Clean with diagonal strokes across the joints, not along them, so you don't pull grout back out of the lines you just filled.
Working with unsanded grout:
- Mix to a slightly thicker paste consistency than you would for sanded grout.
- Apply with a rubber float held at roughly a 45-degree angle, using firm pressure.
- Work in smaller sections than you would with sanded grout, since unsanded typically dries faster.
- Clean with minimal water. Excess water at this stage can weaken unsanded grout as it cures.
- Allow 24 to 72 hours of cure time before exposing the joints to water, longer than most people expect.
PRO TIP — DON'T RUSH THE FIRST SHOWER
The most common early-life grout failure isn't a wrong material choice; it's using the shower too soon after grouting. Give it the full cure window, even if it feels excessive, before the joints see sustained water exposure.
Maintenance: What Changes After Installation
Sanded grout is more porous once cured and generally needs sealing to resist staining. Its slightly textured surface can also trap dirt a bit more easily than a smoother finish, though it holds up well to moderately aggressive cleaning if it does get dirty.
Unsanded grout has a smoother surface that collects less surface dirt, but it's still porous underneath and still benefits from sealing. It's also more delicate overall and responds better to gentler cleaning methods rather than heavy scrubbing.
Regardless of which type you have, all standard cement-based grout benefits from the same basic care: clean regularly with pH-neutral cleaners, reseal periodically (annually is a reasonable default for most homes), wipe up spills before they have time to stain, and avoid harsh acidic or abrasive chemicals that can erode the grout over time.
A Note on Color
Sanded and unsanded grout in the same color can still look slightly different once installed. Sanded grout tends to read a bit lighter because of the visible sand particles. In contrast, unsanded grout often looks slightly more uniform and a shade darker in the same nominal color. If you're using both in the same space, sanded on the floor and unsanded on the walls, for example, it's worth checking a small sample of each side by side before committing, since you may want to nudge the shades to match visually even though the label says the same color.
Common Mistakes to Avoid
- Using unsanded grout in a joint wide enough that it shrinks and cracks
- Using sanded grout on a tile surface that ends up permanently scratched
- Choosing a grout type based on price rather than the application
- Mixing grout types inconsistently across one continuous installation
- Skipping consideration of the room's moisture and traffic level entirely
Nearly all of these trace back to treating this as a minor decision instead of matching the product to the space's actual physical demands.
Sanded vs Unsanded Grout: Side-by-Side Comparison
If you only remember one thing from this guide, remember this: joint width and tile surface are the two questions that decide everything else. Here's how the two grout types stack up across the factors that actually matter for a real project.
Room-by-Room Grout Guide
A fast visual reference for the most common installation types. Joint width and tile finish can shift any of these, so treat it as a starting point rather than an absolute rule.
Kitchen Floor
SANDEDHandles daily foot traffic and standard 1/8"+ joints without cracking.
Kitchen Backsplash
UNSANDEDNarrow joints and often decorative or glass tile favor a smoother finish.
Shower Floor
SANDEDMosaic and pebble tile joints are usually wide enough, and the floor needs the added strength.
Shower Wall
DEPENDSWide joints lean sanded; glass or polished stone leans unsanded.
Bathroom Wall Tile
UNSANDEDNarrow joints and no weight-bearing load make this the standard choice.
Outdoor Patio
SANDEDBetter resistance to temperature swings and weather exposure over time.
Glass Tile, Any Room
UNSANDEDAvoids permanent scratching from sand particles during application.
Polished Natural Stone
UNSANDEDProtects the polished finish, even if strength is slightly traded off.
Preparing the Joint Before You Grout
Whichever grout you choose, the prep work underneath it affects performance just as much as the product itself. Before grouting, confirm your tile has cured in its thin-set or mortar for the manufacturer's recommended time, usually 24 to 48 hours, so the tiles won't shift once you start packing joints. Clear any spacers, remove excess mortar from the joints with a utility knife or grout removal tool so you have the full joint depth to work with, and vacuum or wipe away all dust and debris. Grout applied over dusty or loose joints won't bond properly, and that's a common cause of grout that looks fine initially but starts crumbling or popping out within the first year.
Check your joint depth as well as its width. A joint that's wide on the surface but shallow underneath, often from tiles set with too much mortar squeeze-out, won't hold grout securely even if you pick the technically correct sanded or unsanded product. If joints are shallower than about two-thirds of the tile's thickness, address that before grouting rather than trying to compensate with product choice.
Removing and Repairing Grout: What Type to Use for a Repair
If you're regrouting an existing installation rather than working from scratch, match your repair grout to what's structurally appropriate for the current joint width, not necessarily what was originally used. It's fairly common to find unsanded grout that was installed years ago in a joint that's actually 1/8 inch or wider, either from a past installer's mistake or from natural joint widening as the house settles. If that's the case, use the repair as an opportunity to switch to sanded grout rather than replacing like for like.
To remove old grout, a manual grout saw works for small areas and narrow joints. In contrast, an oscillating multi-tool with a grout removal blade covers larger areas faster and with more control than a rotary tool, which can easily chip tile edges if it slips. Remove grout to the full depth of the joint, not just the visible surface layer, since fresh grout applied over old grout residue won't bond well and tends to fail again quickly.
Applying new grout directly over old, degraded grout without fully removing it first is one of the most common regrouting mistakes. It looks fine for a few weeks, then fails at the same spots, because the new material never actually bonded to the tile edge underneath.
DIY Grouting vs Hiring a Professional
Grouting is one of the more forgiving parts of a tile project to take on yourself, since minor technique issues are usually fixable, and it doesn't require the specialized equipment that cutting or edge polishing does. A small backsplash or a single bathroom floor is a very reasonable DIY project for most homeowners, particularly with unsanded grout on a straightforward wall installation.
Where it makes more sense to bring in a professional is on large continuous floor areas where consistent color and joint appearance matter across a big visible surface, on any installation using epoxy grout, which has a shorter working time and less forgiving cleanup than cement-based grout, and on repair work where the extent of the underlying damage isn't fully clear until removal begins. If you're already paying a professional to install your tile, it's worth asking whether grouting is included or priced separately, since some installers price it as one combined service while others break it out.
Climate and Environment Considerations
Where you live and where the tile is installed both affect this decision. In consistently humid climates or in rooms with poor ventilation, modified grout's added water resistance becomes more valuable regardless of whether you're using sanded or unsanded. In regions with significant seasonal temperature swings, outdoor tile installations benefit from modified, flexible grout that can handle some expansion and contraction without cracking, on top of the sanded-versus-unsanded decision already covered for exterior use.
For homes with radiant floor heating, which introduces regular, mild temperature cycling to the tile and grout, a flexible modified grout is generally recommended over a rigid unmodified formulation, since the repeated expansion and contraction over years is more likely to crack a less flexible product.
Grout Sealing: When and How Often
Sealing isn't part of the sanded-versus-unsanded decision directly, but it's the maintenance step most people skip and then wonder why their grout stained. Cement-based grout, sanded or unsanded, modified or unmodified, should generally be sealed once it has fully cured, typically 48 to 72 hours after installation, and then resealed on a schedule that depends on the traffic and moisture level of the space. High-traffic floors and shower floors often need resealing annually, while lower-traffic walls and backsplashes can sometimes go two to three years between applications. A simple water test tells you when it's time: drip a small amount of water onto the grout, and if it soaks in within a minute or two rather than beading up, the seal has worn through and it's time to reapply.
Choosing a Grout Color That Works With Your Tile
Beyond the sanded-versus-unsanded and modified-versus-unmodified decisions, color affects both appearance and practical maintenance. Lighter grout shows less contrast against light tile but shows dirt and staining more readily over time, particularly in high-traffic or high-moisture areas. Darker grout hides staining better but can look heavy against light-colored tile and may fade unevenly in direct sunlight for outdoor applications. A mid-tone gray remains one of the most forgiving choices for most residential installations, balancing dirt visibility with visual weight against the tile.
Frequently Asked Questions
What is the difference between sanded and unsanded grout?
Sanded grout contains fine silica sand for added strength and shrink resistance, making it suited to joints 1/8 inch or wider and to floors. Unsanded grout has no sand, giving it a smoother consistency that works into narrow joints and won't scratch delicate tile surfaces during application.
Should I use sanded or unsanded grout for a shower?
Treat the floor and walls separately. Shower floors generally do best with sanded grout for strength under foot traffic. Shower walls depend on joint width and tile material: wide joints favor sanded, while glass or polished stone wall tile favors unsanded to avoid scratching.
When should you use sanded grout instead of unsanded?
Use sanded grout for grout joints 1/8 inch or wider, for floor installations, for high-traffic areas, and for most outdoor tile work, where its added strength and shrink resistance matter most.
Is sanded grout better than unsanded grout?
Neither is universally better. Sanded grout is stronger and better suited to wide joints and floors, while unsanded grout is smoother and safer for narrow joints and delicate or polished tile surfaces. The right choice depends entirely on the joint width and the tile material.
What grout should I use for floor tile?
Sanded grout is the standard for most floor installations because it handles weight and foot traffic without cracking. The exception is highly polished floor tile, where unsanded grout may be safer to avoid surface scratching even on a floor.
Can I use sanded grout in a shower?
Yes, and it's generally the better choice for shower floors specifically. For shower walls, it depends on the tile: sanded grout is fine for standard ceramic or porcelain with wider joints, but should be avoided on glass or polished stone.
Should I use sanded or unsanded grout for porcelain tile?
Unpolished porcelain floor tile typically works best with sanded grout. Highly polished porcelain is more prone to scratching from sanded grout's sand particles, so unsanded grout is usually the safer choice regardless of location.
Does unsanded grout crack more than sanded grout?
Unsanded grout is more prone to shrinkage during curing, which can lead to cracking if it's used in joints wider than 1/8 inch. Within its intended narrow-joint range, it performs reliably,, and cracking is not a common issue.
How Long Does Grout Last, and When Does It Need Replacing
Properly installed and maintained cement-based grout can last well over a decade, though shower floors and other constantly wet areas tend to show wear sooner than dry walls or backsplashes. The signs that grout needs attention, rather than just resealing, include visible cracking that runs through the full depth of the joint, grout that crumbles or comes away when pressed with a fingernail, persistent dark staining that resealing and cleaning no longer improve, and any gap where grout has separated from the tile edge, since that gap allows water behind the tile. Isolated cracks or small sections of failing grout can typically be spot-repaired without redoing the entire installation, as long as the surrounding grout is still sound.
Troubleshooting Common Grout Problems
Grout is cracking along wide joints. This is almost always unsanded grout used in a joint that needed sanded, or sanded grout applied without proper slaking time. If the cracking is widespread rather than isolated, it usually points to the wrong product for the joint width rather than an application error.
Grout looks patchy or unevenly colored after curing. Uneven color is typically caused by inconsistent water content during mixing or cleanup, or by sealing before the grout has fully cured. Let grout cure the full recommended time before sealing, and mix each batch to the same consistency throughout a job.
White haze remains on the tile after grouting. This is grout residue, not a flaw in the tile or the grout itself. A grout haze remover formulated for your tile type, applied a few days after installation once the grout has fully cured, typically clears it. Avoid acidic haze removers on natural stone, since they can etch the surface the same way an acidic cleaner would.
Mold or mildew keeps appearing in shower grout. This is more often a ventilation and cleaning issue than a grout selection issue, though unsealed or under-sealed grout is more susceptible since it stays damp longer. Improve bathroom ventilation, reseal on schedule, and consider a mold-resistant modified grout formulation for new installations in consistently humid showers.
Can I mix sanded and unsanded grout in the same project?
Yes, using sanded grout on the floor and unsanded on the walls of the same room is common and appropriate when the joint widths or tile materials differ between the two surfaces. Just be aware the same color may look slightly different between the two types, so check a sample side by side first.
Does grout need to be sealed regardless of type?
Yes. Both sanded and unsanded cement-based grout are porous and benefit from sealing to resist staining, typically applied once the grout has fully cured and then reapplied on a schedule based on traffic and moisture exposure. Epoxy grout is the exception and does not require sealing.
How do I know if my grout joints are wide enough for sanded grout?
Measure the joint with a tape measure or ruler. Sanded grout is appropriate at 1/8 inch (3mm) and wider. Below that width, unsanded grout is the more appropriate choice for proper packing and shrinkage control.
Estimating How Much Grout You'll Need
Buying the right amount matters almost as much as buying the right type, since running short mid-project means matching a batch later, and grout batches can vary slightly in shade even within the same product line. Coverage depends on four factors: tile size, joint width, joint depth, and grout type, with sanded grout generally covering a bit more area per pound than unsanded due to the sand's bulk. Most grout manufacturers provide a coverage calculator on their product packaging or website based on these four inputs, and it's worth using one rather than estimating, since the variables interact in ways that aren't always intuitive. As a general rule of thumb, larger format tile with narrower joints needs meaningfully less grout than small mosaic or pebble tile with the same total square footage, since mosaic and pebble installations have proportionally far more joint length per square foot.
When in doubt, buy slightly more than the calculator suggests and keep the leftover sealed and dry for future touch-ups or repairs, ideally from the same production batch or lot number as your original installation to minimize any shade difference down the line.
Is epoxy grout sanded or unsanded?
Epoxy grout is available in both sanded and unsanded formulations, so the joint-width guidance still applies. The difference is that epoxy uses resin instead of cement as its base, giving it far better stain resistance and eliminating the need for sealing.
What happens if I use sanded grout on glass tile by mistake?
If it hasn't cured yet, remove it immediately and clean the tile before it scratches further, then switch to unsanded grout. If it has already cured, any scratching that occurred during application is typically permanent and the affected tiles may need to be replaced.
Conclusion
Choosing between sanded and unsanded grout comes down to two questions: how wide is the joint, and how delicate is the tile surface. Get those two answers right and the rest of the decision, including modified versus unmodified and whether epoxy is worth the upgrade, falls into place fairly easily. What matters most is not defaulting to whichever grout is cheaper or more familiar, but matching the product to what the specific surface actually needs to hold up over time.
If you're planning a project and want tile that pairs well with either grout type, from pebble and mosaic to glass and natural stone, Pebble Tile Shop carries a full selection for floors, showers, and backsplashes, with support available if you have questions about grout compatibility before you buy.
Planning your next tile project? Browse our full collection of pebble, mosaic, and stone tile.
Shop Pebble Tiles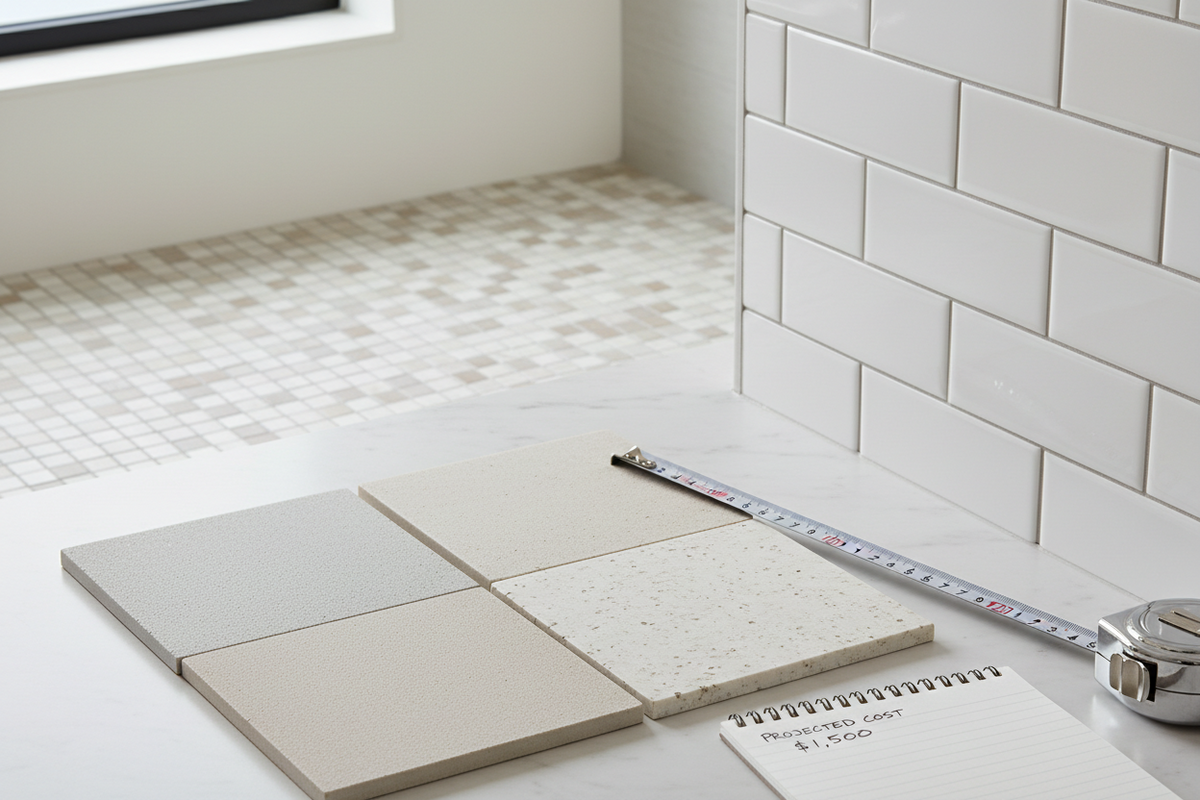

Leave a comment
This site is protected by hCaptcha and the hCaptcha Privacy Policy and Terms of Service apply.