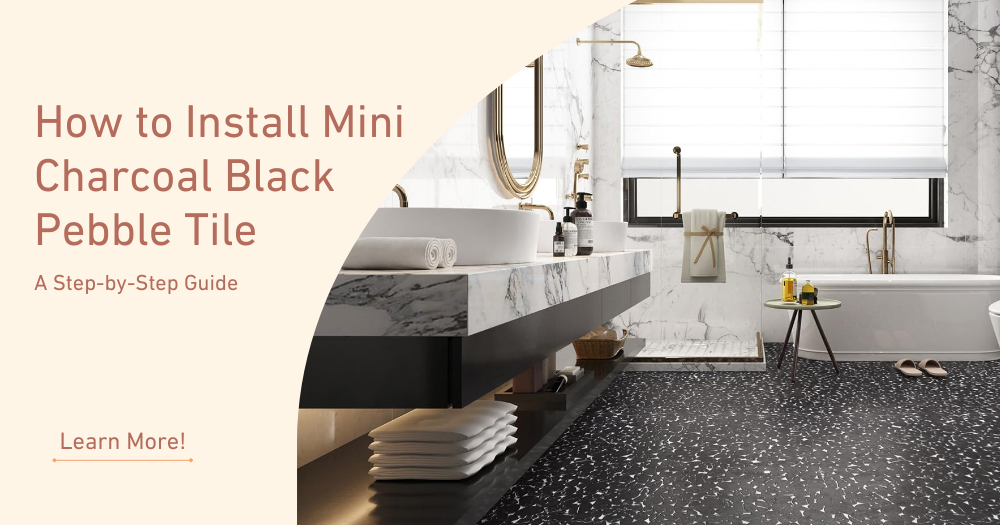
If you're looking to add bold texture and rich, natural style to your space, Mini Charcoal Black Pebble Tile is an outstanding choice. Loved by designers for its organic shape, deep color, and versatility, this tile delivers a dramatic look while remaining easy to maintain and slip-resistant—making it perfect for bathrooms, showers, patios, feature walls, and more.
But how do you get that flawless, spa-like finish at home?
In this blog, we’ll walk you through how to install Mini Charcoal Black Pebble Tile step by step—from surface prep and layout to sealing and maintenance. Whether you're a seasoned DIYer or just starting out, this detailed guide will ensure your tile installation turns out both beautiful and durable.
Looking for high-quality pebble tile?
👉 We offer premium, mesh-backed natural stone mosaics—shop now at Pebble Tile Shop
What Makes Mini Charcoal Black Pebble Tile Special?
Before we dive into the installation, let’s take a moment to appreciate what sets this tile apart.
-
Color: Deep black to charcoal gray hues with slight natural variation
-
Material: Natural Indonesian pebbles, tumbled smooth
-
Shape: Smaller, flatter pebbles for tighter joints and greater comfort underfoot
-
Application: Walls, floors, shower pans, backsplashes, patios, spas, fireplaces
-
Finish: Naturally polished or matte depending on style
This tile creates an organic yet polished look that complements modern, industrial, bohemian, and spa-inspired interiors alike.
Tools & Materials You’ll Need
To install Mini Charcoal Black Pebble Tile correctly, you’ll want to gather the following tools and materials in advance:
Tools:
-
Notched trowel (3/16" or 1/4" V-notch recommended)
-
Rubber grout float
-
Sponge & bucket
-
Tile spacers (optional)
-
Tile nippers or wet saw (for edge cuts)
-
Soft cloth or microfiber towel
-
Level and straightedge
-
Utility knife
Materials:
-
White or gray thin-set mortar
-
Sanded grout (charcoal, black, or dark gray recommended)
-
Stone-safe sealer (penetrating type)
-
Mesh-backed Mini Charcoal Black Pebble Tile sheets (12"x12")
Step-by-Step Guide: How to Install Mini Charcoal Black Pebble Tile
Step 1: Prepare the Surface
Start with a clean, flat, dry surface. Whether you’re tiling over cement board, concrete, or a primed wall, the substrate must be free of dust, grease, or debris.
For wet areas like showers, use a waterproof cement board (like HardieBacker) and ensure seams are sealed with waterproof mesh tape and thin-set.
Pro Tip: Use a level to confirm your surface is even. Uneven substrates may result in uneven pebbles and poor bonding.
Step 2: Dry Layout and Sheet Planning
Before applying any adhesive, lay out the sheets dry on your surface to visualize placement and determine any necessary cuts or adjustments.
-
Arrange sheets to minimize visible seams.
-
Rotate sheets slightly if you notice repeating patterns.
-
Trim or blend individual pebbles as needed with tile nippers for a natural flow.
DIY Secret: Cut out a few pebbles along the edge of one sheet and rearrange them where sheets meet to “stitch” seams invisibly.
Step 3: Apply Thin-Set Mortar
Using your notched trowel, spread a thin, even layer of thin-set mortar on the surface. Work in small areas (2–3 sq. ft.) at a time to prevent the adhesive from drying out.
-
Use white thin-set if the stones are light underneath; gray is fine for charcoal tones.
-
Hold the trowel at a 45° angle to create grooves for better adhesion.
-
Press the tile sheets firmly into the mortar using a slight rocking motion.
Pro Tip: Use a rubber grout float or wood block to gently tamp down the sheets so all pebbles are at the same level.
Step 4: Set and Align the Sheets
Once sheets are in the mortar:
-
Line them up carefully to avoid awkward seams or gaps.
-
Use spacers if needed to keep grout lines even.
-
Check alignment regularly and adjust as needed before the mortar sets.
Let the thin-set cure for 24 hours before grouting.
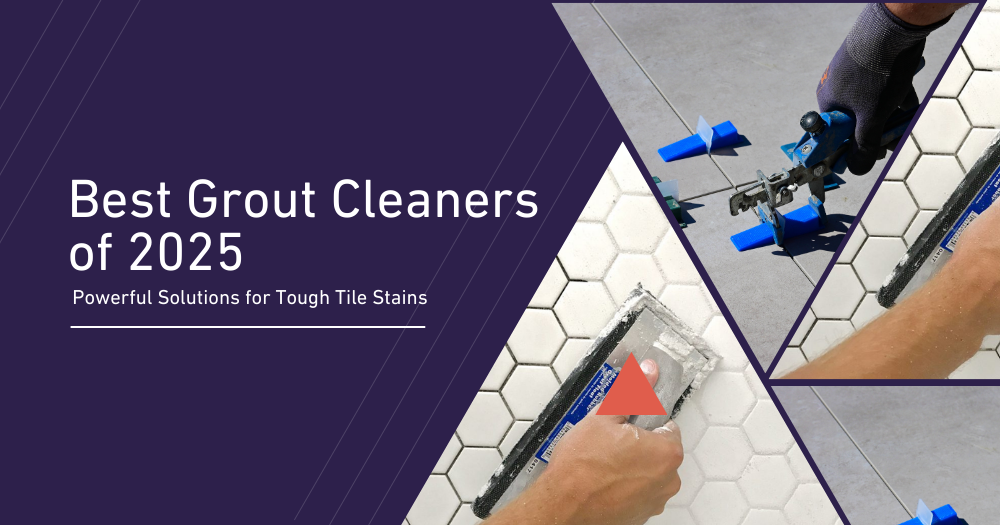
Step 5: Grouting
Grouting pebble tile can be messy—but with care, you’ll get a fantastic result.
-
Use sanded grout to fill the wider joints between pebbles.
-
Apply grout with a rubber float, pressing it into all the spaces and joints.
-
Work in small sections and wipe away excess with a damp sponge in circular motions.
Let grout sit for 15–30 minutes, then sponge again to remove haze.
Important: Be gentle while cleaning to avoid pulling grout from between the pebbles.
Step 6: Final Cleaning and Buffing
After the grout has cured for a few hours:
-
Use a soft, dry cloth to buff off any remaining haze.
-
If needed, use a haze remover product specifically designed for natural stone.
Allow grout to fully cure for 48–72 hours before exposing to water or foot traffic.
Step 7: Sealing
Once your tile and grout are dry, apply a penetrating stone sealer to protect against stains and moisture. This step is especially important in:
-
Showers
-
Entryways
-
Kitchen floors
-
Outdoor installations
Use a brush or clean rag to apply evenly, allow the sealer to absorb, and wipe off excess.
Repeat sealing every 12–18 months in high-use or wet areas.
Installation Tips & Troubleshooting
Here are a few pro-level insights to keep your project looking professional:
💡 Avoid Sheet Grid Lines
The biggest giveaway of a poorly done pebble tile job is visible seams between mesh sheets. Break up the pattern by:
-
Rearranging edge stones
-
Feathering transitions
-
Rotating sheets 90° where possible
💡 Match Your Grout
Charcoal or dark gray grout enhances the richness of the stone and conceals dirt better. White grout may create too much contrast.
💡 Cut Sheets, Not Stones
For edge adjustments, it’s easier to cut the mesh backing rather than trying to trim a whole sheet. Use scissors or a utility knife.
Where Can You Use Mini Charcoal Black Pebble Tile?
This mosaic is incredibly versatile. Some of the best applications include:
-
✅ Bathroom floors
-
✅ Fireplace surrounds
-
✅ Entryway and mudroom flooring
-
✅ Accent walls
-
✅ Spa or sauna areas
Whether you want to add contrast to an all-white bathroom or inject texture into a neutral living room, this tile delivers bold style with natural roots.
Maintenance Tips After Installation
Once your tile is installed, proper care ensures it looks great for years to come:
✅ Clean Regularly
Use a pH-neutral stone cleaner for regular wiping or mopping. Avoid vinegar, bleach, or acidic cleaners that can damage the surface.
✅ Re-Seal Annually
High-moisture areas like showers should be resealed every 12–18 months to prevent grout staining and maintain waterproofing.
✅ Spot Treat Stains
For oily stains, use a poultice or mild degreaser. For mildew, use a grout-safe mold remover—never bleach directly on the stone.
✅ Avoid Harsh Tools
Use soft bristle brushes or cloths only. Avoid metal scrubbers, which can scratch the surface.
Why Choose Pebble Tile Shop?
At Pebble Tile Shop, we don’t just sell tile—we curate it. Our Mini Charcoal Black Pebble Tile is:
-
✔️ Hand-selected for consistent size and color
-
✔️ Mesh-backed for easy installation
-
✔️ Crafted from premium natural stone
-
✔️ In stock and ready to ship nationwide
-
✔️ Supported by expert advice and unmatched customer service
We offer everything you need to transform your space with confidence—from the tile itself to detailed guides like this one.
Final Thoughts
Installing Mini Charcoal Black Pebble Tile is more than a design choice—it’s a way to bring texture, contrast, and timeless appeal into your living space. With the right tools, careful planning, and the steps above, you can achieve a high-end, nature-inspired finish that elevates any room.
Ready to get started?
👉 Shop Mini Charcoal Black Pebble Tile now – We offer fast shipping, expert support, and premium quality every time.

Leave a comment
This site is protected by hCaptcha and the hCaptcha Privacy Policy and Terms of Service apply.