
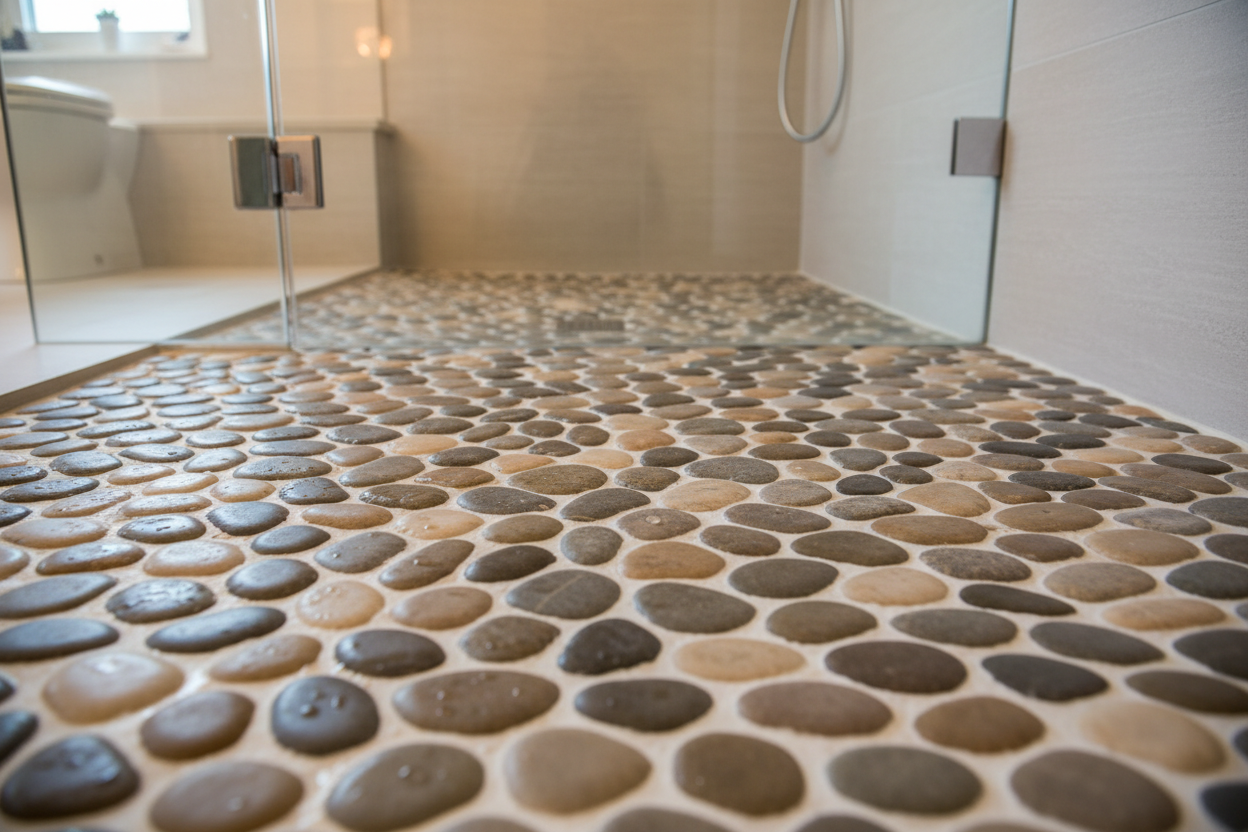
A river rock shower floor is one of the most distinctive and talked-about design choices in residential bathrooms. It looks stunning in photos, feels genuinely different underfoot, and brings a natural material into a space that is usually dominated by flat ceramic and porcelain. But it also comes with real maintenance requirements, specific installation needs, and a handful of genuine drawbacks that are worth understanding before you commit. This guide covers everything, from the real pros and cons to installation, cleaning, sealing, and the most common river rock shower floor problems homeowners actually face.
What is a river rock shower floor?
A river rock shower floor uses small, smooth, naturally rounded stones that have been sorted by size and color, then mounted on a mesh backing to create installable tile sheets. The stones used are typically sourced from riverbeds and beaches, where centuries of water movement have worn them into the smooth, rounded shapes that make them distinctive as a flooring material.
Unlike flat ceramic or porcelain tile, river rock shower floors have a three-dimensional, textured surface, with each stone sitting slightly proud of the grout lines. This creates the characteristic look and feel that makes river rock shower floors so appealing, and also creates the maintenance requirements that catch some homeowners off guard.
River rock shower tiles are sold as mesh-mounted sheets, typically in 12-by-12-inch or 12-by-24-inch formats, making them easier to install than loose stones. The variety of colors, stone sizes, and finishes available makes river rock one of the most flexible natural stone options for shower floor design.
QUICK FACT
River rock shower floors are a subcategory of pebble tile, which includes river rocks, beach pebbles, sliced pebble tile, polished pebble tile, and XL pebble tile. The terms are often used interchangeably, though river rock specifically refers to smooth, naturally rounded river-sourced stones.
River rock shower floor pros and cons
Understanding the genuine advantages and disadvantages of a river rock shower floor before installation prevents the disappointment of discovering the cons after the tile is already set. Here is an honest breakdown of both sides.
Pros of a river rock shower floor
Naturally slip-resistant
The single most practically important advantage of a river rock shower floor is its natural slip resistance. The rounded, uneven surface of each stone creates traction underfoot that flat tile cannot match. The multiple grout lines between individual stones add additional grip, making river rock one of the safest shower floor options available, with no anti-slip coating or treatment required.
This is particularly valuable for households with elderly family members, children, or anyone with mobility concerns. The American Journal of Emergency Medicine estimates that approximately 234,000 Americans are treated in emergency rooms annually for bathroom-related injuries, with slipping on wet surfaces being the leading cause. A naturally slip-resistant floor material addresses this risk at the design level rather than relying on bath mats or anti-slip strips.
A genuine spa-like feel underfoot
Walking on a river rock shower floor is a tactile experience that no other shower-floor material can replicate. The rounded stones create a gentle massage-like pressure on the soles of the feet that many homeowners describe as genuinely relaxing. If you have ever walked barefoot on a smooth pebble beach or riverbank, a river rock shower floor recreates that sensation daily.
This is not a trivial benefit. For many homeowners, the morning shower is one of the few genuinely private, restorative moments in the day, and the sensory quality of the floor surface contributes meaningfully to that experience.
Unique natural beauty
No two river rock shower floors look exactly alike. The natural variation in stone color, size, and shape means that every installation is genuinely one of a kind. River rock shower floors have a visual warmth and organic quality that manufactured tile cannot replicate, and they work across a surprisingly wide range of design styles, from rustic and bohemian to contemporary spa-style and minimalist.
Durable natural stone
River rocks are among the most durable natural materials available. They have spent years or decades being tumbled and compressed by river currents, making them hard, dense, and resistant to physical damage. A properly installed and sealed river rock shower floor, maintained correctly, can last for decades without needing replacement.
Eco-friendly material
River rock is a natural material that requires no manufacturing process beyond sorting, sizing, and mounting on mesh backing. For homeowners prioritizing sustainable and environmentally responsible building materials, river rock is one of the most genuinely natural flooring options available for shower applications.
Hides soap scum and water spots better than smooth tile
The textured, varied surface of river rock is much more forgiving of soap scum, water spots, and minor buildup than smooth, flat tile in light or dark solid colors. The natural variation in stone color and the irregular surface mean that minor residue between deep cleans is far less visually apparent than on a large-format porcelain tile in a single color.
Cons of a river rock shower floor
More grout to clean
The most consistent complaint from homeowners with river rock shower floors is the cleaning effort required. Because river rock tiles have far more grout lines per square foot than standard tile, there is significantly more grout surface area for soap scum, mold, mildew, and mineral deposits to accumulate. What takes five minutes to wipe down on a smooth tile floor can take 20 to 30 minutes on a river rock floor if regular maintenance has been skipped.
This is not a dealbreaker for most homeowners, but it is important to go in with realistic expectations. A river rock shower floor that is cleaned regularly, properly sealed, and consistently maintained looks beautiful for years. One that is neglected develops grout discoloration and mold issues that are genuinely difficult to reverse.
Requires regular sealing
Natural stone is porous, which means it absorbs water and stains if not protected by a sealer. River rock shower floors need to be sealed after installation and resealed every one to two years to maintain that protection. Missing a resealing session allows moisture to penetrate the stone and grout, leading to staining, mineral buildup, and eventually mold growth within the grout lines.
Sealing a river rock shower floor is not optional. Unsealed natural stone in a shower environment will stain, discolor, and develop mold in the grout within months of installation. Always seal immediately after installation, and reseal every 1 to 2 years.
Harder to stand on for long periods
While the massage-like sensation underfoot is a genuine pro for many people, it is also worth acknowledging that standing on a textured river rock surface for an extended period is more tiring than standing on a flat floor. People who take long showers or stand in one position for extended periods for washing hair, shaving, or other activities may find a river rock floor less comfortable than a smooth tile floor over time.
This is particularly worth considering for primary bathroom showers in households where family members have foot conditions, plantar fasciitis, or other foot pain issues.
More complex installation
River rock shower floor installation requires more skill and attention than standard flat tile installation. The shower floor must slope correctly to the drain, the mortar bed must be level and properly sloped, and the river rock sheets must be carefully cut and fitted around the drain and edges. Grout selection and application require care to ensure full coverage without grout protruding above the stone surface. A poorly installed river rock shower floor develops drainage problems, uneven surfaces, and grout failures significantly faster than a well-installed one.
It can be cold underfoot in winter
Natural stone is a thermal conductor, which means river rock shower floors feel cold in winter months, particularly in bathrooms without radiant floor heating. This is a minor consideration for most homeowners but worth noting for anyone in a cold climate or anyone particularly sensitive to cold floors in the morning.
RIVER ROCK SHOWER FLOOR PROS AND CONS SUMMARY
Pros
- Naturally slip-resistant
- Spa-like massage feel underfoot
- Unique natural beauty
- Extremely durable
- Eco-friendly natural material
- Hides minor buildup well
Cons
- More grout lines to clean
- Requires regular sealing
- It can be tiring to stand in the long term
- More complex installation
- Cold underfoot in winter
River rock shower floor problems and how to fix them
River rock shower floor problems are almost always the result of one of three things: inadequate sealing, improper installation, or inconsistent cleaning. Understanding the most common problems and how to address them saves significant time, money, and frustration.
Mold and mildew in river rock shower floor grout
Black or gray discoloration in the grout lines between river rock stones is the most common problem homeowners report on river rock shower floors. It is caused by mold and mildew growth in porous, unsealed, or under-sealed grout exposed to consistent moisture in the shower environment.
To treat mold in river rock shower grout, apply an oxygen bleach solution directly to the affected grout lines and allow it to dwell for 20 to 30 minutes. Scrub firmly with a stiff grout brush in back-and-forth strokes, then rinse thoroughly. For severe mold penetration, a commercial mold remover specifically formulated for natural stone and grout may be needed. After treating and fully drying, reseal the grout immediately to prevent rapid recurrence.
PRO TIP
Running the bathroom exhaust fan during each shower and for at least 20 minutes afterward dramatically reduces moisture buildup in the grout. It significantly slows mold growth on river rock shower floors. Ventilation is the most underrated maintenance tool for any natural stone shower floor.
Soap scum buildup on river rock shower floors
Soap scum builds up faster on river rock shower floors than on flat tile because the textured surface traps soap residue between the stones and in the grout lines. Regular cleaning with a pH-neutral stone cleaner and a nylon brush addresses most soap scum buildup before it becomes a significant problem. For established soap scum, a commercial soap scum remover safe for natural stone can be applied, allowed to dwell, and scrubbed away.
Switching from bar soap to liquid body wash reduces soap scum buildup, as bar soaps leave far more residue than liquid formulations. This is a simple behavioral change that noticeably reduces the cleaning burden on a river rock shower floor.
Calcium and mineral deposits on river rock
Hard water mineral deposits appear as white or gray chalky buildup on river rock stones and in grout lines. According to the US Geological Survey, approximately 85 percent of US homes have hard water, making mineral deposits one of the most widespread problems for shower floors across the country.
For calcium deposits on river rock shower floors, use a commercial calcium remover specifically formulated for natural stone and pH-neutral. Never use white vinegar, muriatic acid, or any other acid-based cleaner on river rock or any natural stone shower floor, as acid permanently etches and damages the stone surface. Apply the pH-neutral calcium remover, allow to dwell according to product instructions, scrub with a nylon brush, and rinse thoroughly.
Never use white vinegar, muriatic acid, or any acid-based cleaner on a river rock shower floor. Acid permanently etches natural stone surfaces, and the damage cannot be repaired without replacing the affected stones. Always use pH-neutral cleaners specifically formulated for natural stone on river rock shower floors.
River rock shower floor drainage problems
Poor drainage on a river rock shower floor is almost always an installation problem rather than a material problem. River rock shower floors require a properly sloped mortar bed that directs water toward the drain at approximately 1/4 inch of fall per linear foot. If the slope is insufficient or uneven, water pools between the stones, accelerating mold, mildew, and mineral deposit buildup.
If you are experiencing standing water on your river rock shower floor after showers, check whether the drain itself is clear of debris first. River rock grout and stone fragments can accumulate in shower drains over time, significantly slowing drainage. If the drain is clear and water still pools, the issue is likely a slope problem in the installation that requires professional assessment and potentially regrading the mortar bed.
Loose or cracked river rock tiles
Individual stones or sections of river rock tile becoming loose or cracked is a sign of either inadequate mortar coverage during installation or moisture penetration beneath the tile due to consistently inadequate sealing. Loose stones should be addressed promptly to prevent water from penetrating beneath the tile and causing further damage to the mortar bed and waterproofing membrane beneath.
To replace a loose river rock stone, carefully remove it with a putty knife, clean the mortar from both the stone and the substrate, apply fresh mortar, reset the stone, allow to cure, then regrout and reseal the affected area. For sections where multiple stones are loose or where the substrate feels soft or hollow, professional assessment is recommended before attempting repairs.
How to install a river rock shower floor
River rock shower floor installation is more demanding than standard flat tile installation and requires careful attention to waterproofing, slope, mortar coverage, and grouting. Here is a complete overview of the installation process.
What you need for a river rock shower floor installation
River rock tile sheets in the quantity required for your shower floor, plus 10 to 15 percent overage for cuts and waste. Polymer-modified thinset mortar suitable for natural stone. A notched trowel in the appropriate size for the tile format. A rubber float for grouting. Sanded grout in the appropriate color—a penetrating impregnating sealer rated for natural stone in wet conditions. A grout saw and a wet saw with a diamond blade for cutting. Rubber gloves, knee pads, and safety goggles.
Step 1: Waterproofing the shower pan
A properly waterproofed shower pan is the foundation of a long-lasting river rock shower floor. The mortar bed or concrete board substrate must be fully waterproofed before any tile is installed. Apply a waterproofing membrane according to the manufacturer's instructions, paying particular attention to corners, seams, and the area around the drain. Allow the waterproofing to cure fully before proceeding.
Never skip the waterproofing step on a shower floor installation. Water that penetrates beneath river rock tile will cause mortar failure, mold growth in the wall cavity, and structural damage to the subfloor over time. Proper waterproofing is the most important step in the entire installation.
Step 2: Creating the correct slope
The shower floor must slope toward the drain at approximately 1/4 inch per linear foot to ensure complete drainage after each shower. For a 36-inch shower floor, this means the floor should be approximately 3/4 inch higher at the walls than at the drain. Use a level and tape measure to verify the slope in multiple directions before setting any tile.
Step 3: Dry lay the river rock tile sheets
Before applying any mortar, lay out the river rock tile sheets dry on the shower floor to plan the layout, identify any cuts needed around the drain and edges, and ensure the pattern looks the way you want it to. This step is particularly important for river rock because the stones' organic, varied pattern means the overall appearance changes significantly depending on how the sheets are oriented and arranged.
Step 4: Apply thinset mortar and set the tile
Apply polymer-modified thinset mortar to the shower floor using a notched trowel, working in sections small enough to set tile before the mortar begins to skin over. Back-butter each river rock tile sheet with a thin additional layer of mortar to ensure complete coverage between the individual stones and the substrate. Press each sheet firmly into the mortar, then use a grout float or a piece of plywood to press the stones evenly into the mortar bed. Check that no individual stones are sitting significantly higher or lower than their neighbors.
Step 5: Grouting the river rock shower floor
Allow the mortar to cure fully, typically 24 to 48 hours, before grouting. Mix sanded grout to a peanut butter consistency and apply with a rubber float, working it diagonally across the tile surface to force grout into all of the spaces between stones. Work in small sections and remove excess grout from the stone surfaces with a damp sponge before it hardens. The goal is for grout to fill all spaces between stones without protruding above the stone surface, which would create a flat appearance and reduce the characteristic textured feel of river rock.
Step 6: Sealing the river rock shower floor
After the grout has fully cured, typically 48 to 72 hours after grouting, apply a penetrating impregnating sealer rated for natural stone for wet applications. Apply the sealer to the entire floor surface according to the product instructions, allow the first coat to penetrate, wipe away any excess before it dries on the surface, and apply a second coat. Allow the sealer to fully cure before using the shower, typically for a minimum of 24 hours.
How to clean a river rock shower floor
Properly cleaning a river rock shower floor preserves both the appearance and the longevity of the installation. The cleaning approach differs significantly from flat tile because of the textured surface, the higher grout-to-tile ratio, and the sensitivity of natural stone to acid-based cleaners.
Daily maintenance for river rock shower floors
After each shower, rinse the floor briefly with clean water to remove soap residue before it dries onto the stone surface. This 30-second habit significantly reduces the frequency at which deep cleaning is required. Run the bathroom exhaust fan for at least 20 minutes after each shower to reduce humidity and slow mold growth in the grout lines.
Weekly cleaning for river rock shower floors
Once a week, apply a pH-neutral natural stone cleaner to the shower floor and scrub with a nylon brush, paying particular attention to the grout lines between stones. Work the brush in back-and-forth strokes along the grout lines rather than circular motions to get into the grout texture effectively. Rinse thoroughly and allow to dry. A weekly cleaning routine of 10 to 15 minutes keeps most river rock shower floors looking clean without requiring more intensive treatments.
Monthly deep cleaning for river rock shower floors
Once a month, focus specifically on the grout lines using a stiff-bristled grout brush and a grout-safe cleaner for natural stone. This addresses any buildup that the weekly cleaning misses and keeps grout from developing the discoloration that is difficult to reverse once established. After monthly deep cleaning, check whether any areas feel less water-resistant than others, which may indicate the sealer is wearing in those spots and a spot resealing is needed.
PRO TIP
The water bead test is the easiest way to check whether your river rock shower floor needs resealing. Sprinkle a few drops of water on the stone surface. If the water beads up and sits on the surface, the sealer is still effective. If the water soaks in and darkens the stone within 30 seconds, it is time to reseal.
River rock shower floor ideas and design inspiration
River rock shower floors work in a much wider range of design styles than many homeowners expect. Here are some of the most popular and visually effective ways to incorporate river rock into shower design.
Classic river rock shower floor with white subway tile walls
The most popular combination for river rock shower floors is pairing a natural gray-and-tan river rock floor with white subway tile on the shower walls. The contrast between the organic, textured floor and the clean, linear wall tile creates a spa-like bathroom that feels both natural and contemporary. This combination works in bathrooms of almost any size and complements a wide range of fixture finishes from chrome to brushed nickel to matte black.
River rock shower pan with large format wall tile
Pairing a river rock shower floor with large-format wall tile in a light stone or concrete look creates a sophisticated, contemporary bathroom where the river rock floor reads as a deliberate textural accent rather than the dominant surface. The contrast between the large, smooth wall tiles and the small, textured floor stones creates visual interest without either surface competing with the other.
Mixed pebble tile shower with river rock floor and pebble accent strip
Incorporating a pebble tile border or accent strip at the transition between the shower floor and walls adds a custom, finished look to a river rock shower floor installation. A horizontal strip of standing pebble tile at eye level on the shower wall, combined with a river rock floor, creates a cohesive natural stone aesthetic throughout the entire shower space.
Dark river rock shower floor for a dramatic look
Charcoal-black river rock tiles create a dramatically different aesthetic from the more common gray and tan blends. A dark river rock shower floor in a bathroom with white walls and chrome or brushed nickel fixtures creates a striking, high-contrast look that feels both contemporary and luxurious. Dark river rock floors are more forgiving of water spots and soap residue in terms of visibility, though they require the same cleaning and sealing routine as lighter options.
Spa-style bathroom with pebble tile throughout
For a fully spa-inspired bathroom, using river rock tile on the shower floor, a pebble tile feature wall in the shower, and natural stone tile on the bathroom floor creates an immersive, resort-like environment. Paired with wood accents, large plants, and rainfall shower fixtures, this design approach transforms a standard bathroom into a daily retreat.
River rock shower floor vs other shower floor options
Understanding how river rock compares to other shower floor options helps clarify whether it is the right choice for your specific bathroom, lifestyle, and maintenance preferences.
River rock shower floor vs standard ceramic tile
Standard ceramic or porcelain tile is easier to clean, less expensive to install, and more forgiving of irregular maintenance than river rock. River rock offers significantly better natural slip resistance, a more distinctive aesthetic, and a sensory experience that flat ceramic cannot replicate. For homeowners who prioritize easy maintenance above all else, ceramic is the more practical choice. For homeowners who value the natural look, the spa-like feel, and the genuine slip resistance, river rock is worth the additional maintenance commitment.
River rock shower floor vs large format tile
Large-format tile (tiles 24 by 24 inches or larger) has become increasingly popular for shower floors and offers a dramatically different aesthetic from river rock. Large-format tile has minimal grout lines, is easy to clean, and creates a sleek, modern look. It requires anti-slip treatment or a textured finish for safe use on shower floors, unlike river rock, which is naturally slip-resistant. The choice between the two comes down to aesthetic preference and willingness to clean more complex grout patterns.
River rock shower pan vs tiled shower pan
A river rock shower pan refers to the complete shower floor and base area tiled with river rock, which is the most common application. The distinction between a river rock shower pan and a tiled shower pan is primarily one of scale and coverage rather than installation method, as both use the same waterproofing and mortar setting techniques. A river rock shower pan is often preferred for freestanding or walk-in showers where the floor is a visible focal point.
River rock shower floor vs pebble tile
River rock shower floor tile and pebble tile are closely related categories with overlapping products. River rock tile uses naturally rounded, river-sourced stones. In contrast, pebble tile is a broader category that includes polished pebble tile, sliced pebble tile, XL pebble tile, and mini pebble tile, as well as standard river rock. Sliced pebble tile, which cuts each stone in half to reveal its flat interior face, offers a flatter, lower-profile surface that is easier to clean than rounded river rock while maintaining the natural stone aesthetic.
How to seal a river rock shower floor
Sealing a river rock shower floor correctly is the most important maintenance task for preserving the floor's appearance and preventing the common problems of mold, staining, and mineral deposit buildup.
Choosing the right sealer for river rock shower floors
A penetrating impregnating sealer specifically formulated for natural stone in wet applications is the correct product for sealing a river rock shower floor. This type of sealer bonds within the stone and grout rather than forming a surface coating, allowing water vapor to escape while preventing liquid water and oils from penetrating. Water-based impregnating sealers are appropriate for interior shower applications. Avoid topical sealers that form a surface film on natural stone, as they trap moisture beneath the surface and eventually peel or delaminate in a wet shower environment.
How to apply sealer to a river rock shower floor
Ensure the floor is completely clean and dry before applying sealer. Apply the sealer to the floor surface using a soft brush, foam roller, or cloth applicator, working in small sections. Allow the sealer to penetrate for the time specified on the product label, typically 5 to 15 minutes. Wipe away any excess sealer that has not been absorbed before it dries on the surface, as dried excess sealer leaves a hazy residue. Apply a second coat following the same process. Allow the sealer to cure fully before using the shower, typically a minimum of 24 hours.
How often should you reseal a river rock shower floor
Reseal a river rock shower floor every 12 to 24 months, depending on the shower's usage frequency and the type of sealer used. Perform the water bead test every 6 months to check whether the sealer is still performing. If water soaks into the stone rather than beading on the surface, it is time to reseal regardless of when the last resealing was done.
River rock shower floor cost
Understanding the full cost of a river rock shower floor helps with budgeting and comparing it realistically against other shower floor options.
River rock tile material cost
River rock tile sheets typically cost between $3 and $12 per square foot for the tile material itself, depending on the stone type, color, and finish. Standard river rock pebble tile is at the lower end of this range, while specialty finishes such as polished pebble tile and imported stone blends command higher prices. Order 10-15% more than your measured square footage to account for cuts and waste during installation.
River rock shower floor installation cost
Professional installation of a river rock shower floor typically adds $5 to $15 per square foot to the total project cost, including waterproofing, mortar, grout, and labor. For a standard 36-by-36-inch shower floor of approximately 9 square feet, the total installed cost of a river rock shower floor typically falls between $80 and $240 for materials plus $45 to $135 for professional installation labor, for a total range of approximately $125 to $375 for the floor alone.
Larger or more complex shower floors, those requiring custom cuts around unusual drain positions or irregular shapes, will cost proportionally more. The complexity of river rock installation, compared to flat tile, means professional installation is more often recommended than for standard tile types.
River rock shower floor key takeaways
SUMMARY
- River rock shower floors are naturally slip-resistant, du andable, and creatingenuine spa-like experience underfoot.
- The main cons are increased cleaning requirements and the need for regular sealing every 1 to 2 years.
- The most common problems are mold in grout lines, soap scum buildup, and mineral deposits, all of which are preventable with regular maintenance and proper sealing.
- Never use acid-based cleaners, including white vinegar, on river rock shower floors.
- Proper waterproofing and slope during installation prevent the majority of long-term drainage and moisture problems.
- Seal immediately after installation and perform the water bead test every 6 months to monitor sealer performance.
- Ventilation after every shower is the most underrated maintenance practice for river rock shower floors.
Frequently asked questions
Are river rock shower floors hard to maintain?
River rock shower floors require more maintenance than smooth, flat tile because of the higher number of grout lines per square foot. With a consistent routine of daily rinsing, weekly cleaning with a pH-neutral stone cleaner, and resealing every 1 to 2 years, most homeowners find the maintenance manageable. The problems arise when maintenance is skipped, and mold or mineral buildup becomes established in the grout.
What are the most common problems with river rock shower floors?
The most common river rock shower floor problems are mold and mildew growth in grout lines due to inadequate sealing or poor ventilation, soap scum and mineral deposit buildup on the stone surface, drainage problems from insufficient slope in the mortar bed, and loose or cracked stones from incomplete mortar coverage during installation.
Is a river rock shower floor slippery?
No, river rock shower floors are not slippery. The rounded, uneven surface of each stone and the multiple grout lines between stones create natural traction underfoot, making river rock one of the safest shower floor options available, with no anti-slip coating or treatment required.
How do I clean mold from a river rock shower floor?
Apply an oxygen bleach solution to the affected grout lines, allow to dwell for 20 to 30 minutes, then scrub with a stiff grout brush and rinse thoroughly. After treating and drying completely, reseal the floor to prevent rapid recurrence. Never use chlorine bleach directly on natural stone as it can damage the stone surface and accelerate grout deterioration.
How often does a river rock shower floor need to be sealed?
A river rock shower floor should be sealed immediately after installation and resealed every 12 to 24 months, depending on usage frequency. Perform the water bead test every 6 months by sprinkling water on the stone surface. If water soaks in rather than beading, reseal immediately regardless of when the last application was done.
What is the difference between a river rock shower floor and a pebble tile shower floor?
River rock shower floor tile and pebble tile are closely related. River rock specifically refers to smooth, naturally rounded stones sourced from riverbeds. Pebble tile is a broader category that also includes polished pebble tile, sliced pebble tile, XL pebble tile, and mini pebble tile. All river rock shower tiles are pebble tile, but not all pebble tile is river rock.
Can I install a river rock shower floor myself?
River rock shower floor installation is possible for experienced DIYers, but is more demanding than standard flat tile installation. The waterproofing, slope, mortar coverage, and grouting all require careful execution. Mistakes in any of these steps lead to drainage problems, mold, and premature tile failure. Professional installation is recommended for homeowners without previous tile installation experience.
How do I fix a river rock shower floor that smells musty?
A musty smell from a river rock shower floor is almost always caused by mold growth in the grout lines or, in more serious cases, beneath the tile, due to moisture that has penetrated through inadequately sealed grout. Treat the visible grout with an oxygen bleach solution and reseal thoroughly. If the smell persists after treating the surface, moisture may have penetrated beneath the tile,, and a a professional assessment may be needed to determine whether the installation needs to be partially redone.
Conclusion
A river rock shower floor is one of the most rewarding design choices you can make in a bathroom renovation, but it works best for homeowners who understand what they are committing to before installation. The natural slip resistance, the spa-like sensory experience, and the genuine one-of-a-kind beauty of a river rock shower floor are real advantages that no flat tile can replicate. The additional cleaning requirements, the sealing schedule, and the more demanding installation process are equally real and worth taking seriously.
The homeowners who most love their river rock shower floors are the ones who went in with realistic expectations, had the floor properly installed and sealed from the start, and built a simple maintenance routine into their schedule. The homeowners who are disappointed are almost always those who skipped sealing, neglected the grout, or had an installation that cut corners on waterproofing or slope.
If you are ready to explore river rock shower floor tile options, browse the full collection at Pebble Tile Shop, including standard river rock pebble tile, sliced pebble tile for a lower-maintenance alternative, mini pebble tile for finer texture and more grout lines underfoot, and polished pebble tile for a more refined spa-style finish—free shipping on most US orders.
Explore our full collection of river rock pebble tile, sliced pebble tile, mini pebble tile, and polished pebble tile for shower and bathroom floors, as well as outdoor spaces.
Shop Pebble Tiles Now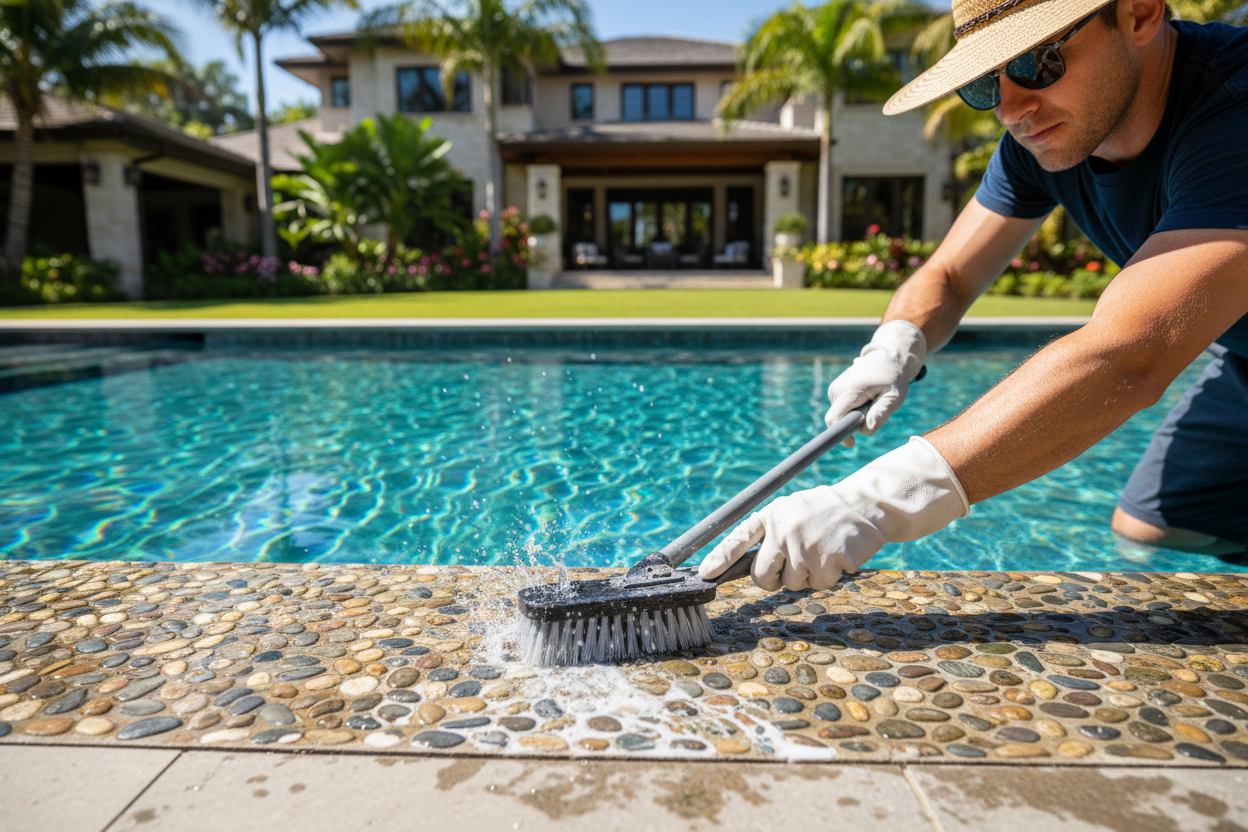

Leave a comment
This site is protected by hCaptcha and the hCaptcha Privacy Policy and Terms of Service apply.