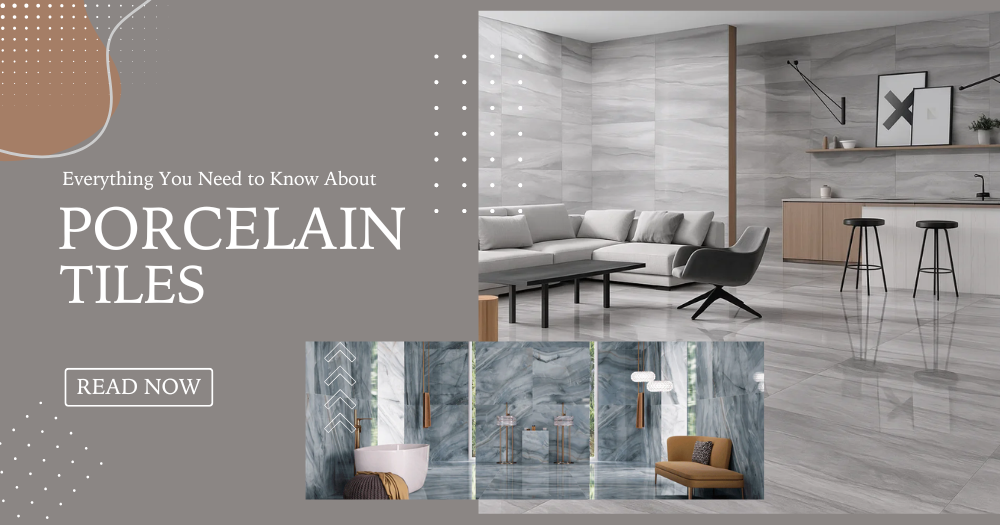
Intro — Why Porcelain Tiles Are a Smart Choice for Busy Homes
Porcelain tiles are the kind of surface you install once and enjoy for years. They handle muddy shoes, kitchen spills, steamy showers, and even outdoor weather when rated for exterior use. In this guide, you’ll get the essentials in plain English: what porcelain tiles are, the benefits that matter, how much to budget, simple installation steps, and easy care tips. You’ll also find a short buyer’s checklist, a quick comparison with ceramic and natural stone, and design ideas that pair beautifully with Pebble Tile Shop’s natural pebble and stone accents.
What Are Porcelain Tiles? (And How They Differ From Regular Ceramic)
Porcelain is a type of ceramic tile made from refined clay and fired at higher temperatures. That process makes the tile denser and less porous than standard ceramic. In everyday terms, porcelain is tougher, absorbs less water, and stands up better to stains and temperature swings.
How it differs from typical ceramic:
-
Density & strength: Porcelain is harder and more durable.
-
Moisture absorption: Porcelain has very low water absorption, which helps in bathrooms, kitchens, and some outdoor areas.
-
Maintenance: Smooth, dense surfaces resist stains and are easy to clean.
-
Cost: It can be pricier than standard ceramic, especially for large formats or premium finishes, but the longevity often offsets the difference.
Key Benefits at a Glance
-
Built for traffic: Porcelain handles busy entryways, kitchens, and open-concept living spaces without wearing down quickly.
-
Water and stain resistance: Low absorption makes it a smart pick for bathrooms, laundry rooms, and mudrooms.
-
Design variety: Choose wood-look planks, stone-look slabs, concrete looks, and detailed mosaics to match any style.
-
Low maintenance: Routine sweeping and a neutral cleaner are usually enough to keep it fresh.
-
Heat-friendly: Works well with radiant heating and around fireplace surrounds when installed to spec.
-
Safer underfoot options: Textured and matte finishes improve traction in wet zones like shower floors.
Types of Porcelain Tiles (Choose the Right Finish & Format)
-
Glazed porcelain: A durable, colored or patterned surface layer that delivers a wide range of looks—stone, wood, or abstract.
-
Unglazed/through-body porcelain: Color runs through the tile; minor chips are less noticeable. Great for high-wear areas.
-
Finishes:
-
Matte: Subtle, modern, and practical for floors.
-
Polished: High sheen for dramatic spaces; better for walls or low-splash areas.
-
Textured/structured: Extra grip where you need slip resistance.
-
Formats:
-
Rectified edges: Precisely cut for thinner grout lines and a sleek look.
-
Large-format: Fewer joints and a seamless feel; needs very flat substrates.
-
Mosaics: Excellent for shower floors, niches, and borders thanks to added grip and flexible sheets.
For patios and walkways, look for outdoor-rated porcelain that is frost-resistant and has an appropriate surface texture.
Ratings That Matter: Wear & Slip Resistance (Explained Simply)
You don’t need to memorize standards. Focus on two practical ideas:
-
Wear suitability: Choose tiles intended for the foot traffic in your room—light for walls, medium-to-heavy for kitchens and entryways.
-
Slip resistance: In wet zones (showers, bathroom floors, pool surrounds), select a textured or matte finish and, when possible, mosaic sheets for better grip.
Your product page or spec sheet will clearly state suitability by area. When in doubt, match the finish to the room’s use.
Cost Breakdown — Material, Installation & Hidden Line Items
Materials: Porcelain tiles range from budget-friendly basics to premium large-format and specialty looks. Expect higher prices for polished finishes, rectified edges, and extra-large sizes.
Labor and installation drivers:
-
Tile size and layout: Herringbone, chevron, or diagonal patterns take more time and cuts.
-
Substrate prep: Floors and walls must be flat, clean, dry, and structurally sound; extra prep adds cost.
-
Demolition & disposal: Removing old flooring and hauling debris can add a line item.
-
Accessories: Trims, bullnose edges, thresholds, and metal profiles complete the job and affect the finish cost.
-
Materials you don’t see: Leveling clips, spacers, polymer-modified thinset, grout, and waterproofing or crack isolation membranes.
Example for 100 sq ft (mid-range):
-
Tile: add 10%–15% overage for cuts and future repairs.
-
Mortar/grout/accessories: plan a sensible buffer.
-
Labor: complexity, room shape, and prep drive the final number.
This isn’t a quote—just a realistic way to structure your budget so there are no surprises.
Installation Guide (Step-by-Step)
1) Assess & Prep the Subfloor/Wall
Make sure surfaces are flat, clean, dry, and stable. In showers and wet zones, use proper waterproofing. For large-format tiles, flatness is critical to avoid lippage (uneven edges).
2) Dry-Lay & Plan Your Layout
Snap centerlines, then dry-lay a few rows to confirm pattern and cuts. Decide on grout joint size based on edge type (rectified can go tighter). Leave movement joints at the perimeter and as required by the space.
3) Cutting Porcelain Cleanly
Use a wet saw with a porcelain-rated blade for smooth edges. Score and snap tools can work for small cuts, but porcelain’s density makes a wet saw the safer choice. Ease sharp edges with a rubbing stone where needed. Always wear eye and hearing protection.
4) Set With the Right Mortar
Use a polymer-modified thinset rated for porcelain. Key-in mortar on the substrate and back-butter large-format tiles to ensure full coverage. Hold the trowel at a consistent angle and comb in one direction; collapse ridges by sliding the tile perpendicular to the lines. Use leveling clips if needed to reduce lippage.
5) Grout & Finish
After the thinset cures, apply grout suited to your joint width. Follow the label for working time. Wipe with a damp sponge in light passes to avoid washing out joints. Remove haze after initial set with a microfiber cloth. Consider high-performance grouts for stain resistance and color consistency.
6) Cure, Seal (If Needed) & First Clean
Let the installation cure fully before foot traffic or moving appliances back. Porcelain tile faces typically don’t need sealing, but some grout types do—check product guidance. Give the floor a gentle first clean with a neutral pH cleaner and clean water rinse.
DIY or Hire a Pro? A Quick Decision Checklist
DIY if:
-
Your space is simple, the substrate is flat, and the layout is straightforward.
-
You can manage precise cuts and patient leveling.
Hire a pro if:
-
You’re using large-format tiles, adding radiant heat, building a shower pan, or setting complex patterns.
-
You’re on a tight timeline and want a warranty and peace of mind.
Maintenance & Cleaning (Keep It Looking New)
-
Regular care: Sweep or vacuum to remove grit, then mop with a neutral pH cleaner. Rinse with clean water.
-
Avoid: Waxes, oil-based soaps, harsh acids, and abrasive pads that can dull finishes or damage grout.
-
Grout care: Clean periodically; reseal if your grout type requires it. Spot treat spills sooner rather than later to keep joints bright.
Common Mistakes to Avoid
-
Skipping substrate prep or installing over uneven floors.
-
Using the wrong mortar or the wrong trowel size for the tile format.
-
Forcing tight joints with non-rectified tiles.
-
Forgetting expansion and movement joints.
-
Rushing cure times and loading the floor too soon.
Best Places to Use Porcelain (Room-by-Room)
-
Bathrooms & showers: Choose textured floors or mosaics for traction and larger tiles on walls for a clean, airy feel.
-
Kitchens: Durable, easy to clean, and compatible with radiant heat.
-
Entryways & mudrooms: Handles grit and moisture from outdoors.
-
Laundry rooms: Resists drips, detergents, and frequent cleaning.
-
Outdoors (when rated): Frost-resistant, textured surfaces work well for patios and walkways.
-
Fireplace surrounds: Heat-tolerant and design-forward.
Porcelain vs Ceramic vs Natural Stone — Quick Buyer’s Guide
-
Porcelain: Tough, low absorption, versatile looks, low maintenance. Ideal for high-traffic areas and wet rooms.
-
Ceramic: Budget-friendly and easier to cut. Great for walls and lighter-use floors.
-
Natural stone: Timeless, unique variation and character. Needs sealing and more specific care routines.
Choose porcelain for durability and low upkeep, ceramic for cost-effective walls or low-traffic rooms, and stone when you want a premium, organic look and don’t mind extra maintenance.
Buying Checklist (Don’t Miss These Details)
-
Measure the space carefully and add 10%–15% for cuts and future repairs.
-
Confirm lot/shade numbers so boxes match.
-
Match finish and slip resistance to the room’s use.
-
Plan trims, thresholds, and profiles before you order.
-
Pick grout color early and confirm it against your tile under the room’s lighting.
-
Verify your thinset and grout are compatible with porcelain and your tile’s size.
FAQs
Q: Are porcelain tiles slippery?
A: They don’t have to be. Choose textured or matte finishes in wet areas, and consider mosaics where extra grip is needed.
Q: Do porcelain tiles need sealing?
A: The tile surface usually doesn’t. Certain grout types do—check the product label.
Q: Can I install porcelain over existing tile?
A: Sometimes, if the existing tile is sound, flat, and properly prepared. A professional can confirm. You may still need transitions at doorways.
Q: What grout joint size is best?
A: Follow the tile’s edge type and manufacturer guidance. Rectified tiles can use tighter joints; non-rectified tiles need slightly wider joints to account for minor size variations.
Q: Is porcelain good for outdoors?
A: Yes—if the tile is outdoor-rated and offers slip resistance suitable for wet or icy conditions in your climate.
Q: Can porcelain go over radiant heating?
A: Yes. Follow the heating system manufacturer’s instructions and use the right mortar and membrane for thermal movement.
Conclusion — A Durable, Stylish Surface That Works Hard for Years
Porcelain tiles bring together timeless style and everyday strength, making them one of the most practical choices for modern homes. With the right finish, size, and pattern, they perform beautifully in kitchens, bathrooms, entryways, and even outdoor spaces when rated for exterior use. When installed correctly—with proper surface prep, quality mortar, and well-chosen grout—you’ll enjoy a surface that stays elegant and functional for years.
To take your design even further, consider pairing your porcelain floors or walls with natural pebble or stone mosaics for a unique, organic touch. Pebble accents create a warm, spa-like feel in bathrooms, shower floors, and feature walls—blending effortlessly with the clean lines of porcelain.
Explore our full range of porcelain, pebble, and stone tiles at Pebble Tile Shop and discover stunning options that balance durability with natural beauty.
If you’re planning a remodel, check out our Pebble Tile Collection for creative combinations that elevate your space.
Pebble Tile Shop is proud to be part of the Tile Hub family—our parent company dedicated to delivering premium tiles and design inspiration for every corner of your home. Together, we bring craftsmanship, quality, and design innovation to surfaces that truly stand out.
Leave a comment
This site is protected by hCaptcha and the hCaptcha Privacy Policy and Terms of Service apply.