
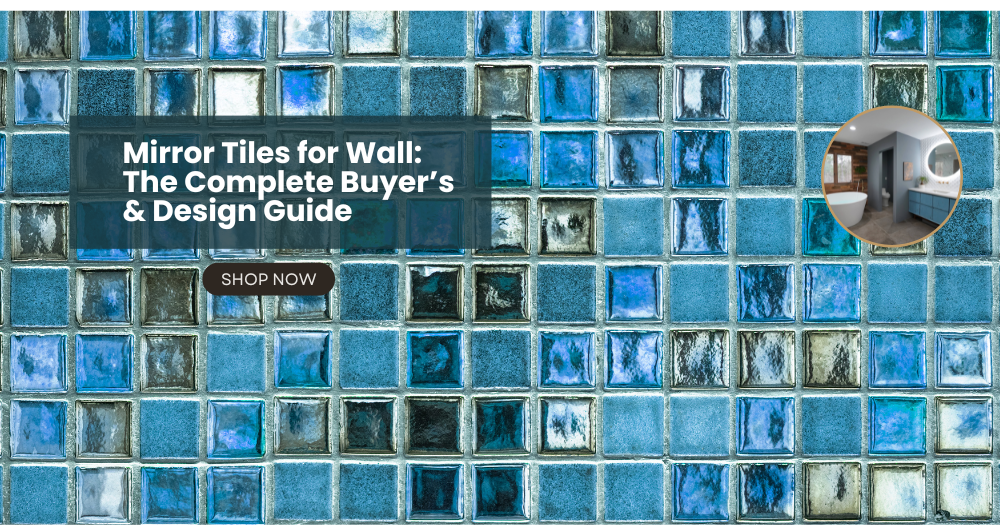
If you’ve been searching for mirror tiles for wall projects, you’re probably chasing one of three things: more light, more depth, or a statement look that feels intentional (not “last-minute DIY”). Mirror tiles can do all of that—when you pick the right type, plan the layout, and understand what the finished surface will really look like.
This guide keeps it simple and practical. You’ll learn the main types of mirror tiles, what they typically cost, the real pros and cons, where they look best, and what to check before you buy. If you’re still deciding, you’ll walk away knowing exactly what to choose for your space.
- Mirror tile types (standard, beveled, antique/tinted, mosaic)
- Shapes and sizes that change the final look
- Cost factors and budgeting tips
- Pros/cons you should know before installing
- Room-by-room ideas + a simple planning checklist
What Are Mirror Tiles for Wall? A Quick Definition + Common Use Cases
Mirror tiles are smaller mirrored pieces designed to cover a wall in a tiled pattern. Instead of one large mirror, you get a surface made of multiple sections—sometimes clean and minimal, sometimes decorative and faceted, depending on the style you choose.
People love mirror tiles because they can brighten a room and make it feel bigger without a full wall mirror. They’re also a popular choice when you want a feature wall that’s more creative than paint, but less permanent than a major remodel.
Common places you’ll see mirror tiles for wall designs:
- Entryways and hallways: Great for bouncing light through narrow spaces.
- Living rooms: Feature walls behind a console or near a window.
- Dining rooms: A statement wall that reflects lighting and adds drama.
- Powder rooms: Smaller rooms where reflection adds depth (with moisture considerations).
- Home bars or shelving walls: Especially with tinted or antique finishes.
Mirror tiles aren’t ideal for heavily textured walls, uneven surfaces, or areas where they’ll be constantly bumped (unless you choose a more durable, safety-focused option and install it correctly).
Types of Mirror Tiles for Wall (Choose Based on Look + Practicality)
Not all mirror tiles look the same once they’re on the wall. The “right” choice depends on how crisp you want the reflection, how decorative you want the surface to feel, and how much texture you’re okay with from seams or grout lines.
1) Glass Mirror Tiles (Standard)
Standard glass mirror tiles give you the most classic mirror look. The reflection is typically clear and bright, and the overall style works in modern, transitional, and glam spaces. If you want a mirror wall that feels clean and straightforward, this is usually the safest starting point.
Things to keep in mind: standard mirror tiles can be heavier than peel-and-stick alternatives, and the wall surface needs to be flat to avoid a wavy or distorted look.
2) Beveled Mirror Tiles (More Decorative, More ‘Designer’)
Beveled mirror tiles have angled edges that catch the light. That small detail creates a more dimensional, sparkly effect—especially under pendant lights, sconces, or natural light from a window. Beveled styles are often chosen for accent walls where you want the mirror to feel like décor, not just reflection.
The tradeoff: bevels can collect dust along edges a bit more than flat mirrors, and the surface will look more “faceted” (which many people love, but it’s good to expect it).
3) Antique / Smoked / Tinted Mirror Tiles (Softer Reflection, Moodier Style)
If you like the idea of mirror, but don’t want a super-bright, crisp reflection, tinted or antique mirror tiles are worth considering. These finishes soften the look, reduce glare, and add a more boutique, curated vibe—especially in dining rooms, bars, and entryways.
They’re also great when you want a reflective wall that complements warm metals (like brass) and natural textures (like wood or stone) without feeling overly shiny.
4) Mirror Mosaic Tiles (Smaller Pieces on Mesh)
Mirror mosaic tiles typically come as sheets with smaller mirror pieces attached to a mesh backing. They’re popular because you can create texture and pattern quickly, and they’re especially useful for smaller zones like a decorative band, a niche, or a compact feature area.
Because mosaics have more seams (and often grout lines), they create a more textured, tile-forward look. That can be a design advantage, but it also means you’ll want to think about maintenance and cleaning—especially in high-touch areas.
Quick “how to choose” guide:
- Want the clearest reflection? Choose standard glass mirror tiles.
- Want a statement wall with sparkle? Go with beveled mirror tiles.
- Want a softer, moodier finish? Consider antique or tinted mirror tiles.
- Want texture or pattern in smaller spaces? Mirror mosaic sheets are a strong pick.
Mirror Tile Shapes, Sizes, and Finishes: What Changes the Final Look
Mirror tiles don’t just reflect your room—they also create a pattern. Size, shape, edge style, and the number of seams all influence whether the final wall feels calm and minimal or bold and decorative.
Size matters: smaller tiles create more seams and a more “tiled” surface. Larger tiles usually feel cleaner and give a less broken-up reflection, but they may be trickier to handle and plan around outlets or tight corners.
Shapes matter too: squares feel modern and geometric, rectangles can lean classic (especially in subway-style layouts), and specialty shapes bring a more artistic or boutique finish. If you want the mirror to feel like a design element, shape is one of your strongest tools.
Finish details you’ll notice:
- Edge style: beveled edges add sparkle; straight edges look crisp and clean.
- Tile thickness: thicker glass often feels sturdier and more substantial.
- Backing quality: strong backing supports long-term durability (especially in moisture-prone areas).
One important expectation: multiple tiles will naturally create a segmented reflection. That’s not a flaw—it’s part of the style. The goal is choosing a segmentation level you actually like.
Mirror Tiles for Wall Cost: What You’ll Pay (Materials + Installation)
Mirror tile pricing varies because “mirror tile” can mean several different products—from basic flat mirrors to decorative beveled and specialty finishes. Your final cost depends on the finish, thickness, edge style, and how complex the installation is.
What typically drives the material cost:
- Finish: tinted, smoked, and antique looks often cost more than standard.
- Edge detail: beveled styles tend to be priced higher.
- Tile format: mosaic sheets vs. larger tiles can vary depending on design and materials.
- Thickness and build quality: sturdier glass and premium backing can cost more.
Installation costs depend on:
- Wall prep: flat, clean walls are faster; uneven walls take more time and effort.
- Cuts and obstacles: outlets, switches, corners, and trim increase labor.
- Pattern complexity: a simple grid is easier than a detailed mosaic layout.
Budget-friendly ways to get the look:
- Create a feature panel instead of a full wall.
- Use mirror mosaics in smaller statement areas like a bar zone or decorative strip.
- Choose a flatter style for a clean reflection and invest more in good lighting (which often has a bigger impact than people expect).
Pros and Cons of Mirror Tiles for Wall (Real-World, Not Pinterest-Perfect)
Mirror tiles can look stunning, but they’re not “set it and forget it.” Here’s what they do well—and what you should be ready for.
Pros
- They brighten spaces: mirror surfaces bounce light and help rooms feel more open.
- They add depth: especially helpful in small rooms, narrow hallways, or dim corners.
- They create a focal point: a mirror tile wall can be the design “anchor” of a room.
- You can scale the project: do a full wall, a half wall, a border, or a panel.
- They pair beautifully with lighting: sconces and pendants look more dramatic with reflective surfaces.
Cons
- They show smudges: fingerprints and dust are more noticeable than on painted walls.
- Seams change the reflection: the mirror surface is segmented, especially with smaller tiles.
- Wall prep matters: uneven walls can create distortion that’s hard to ignore once installed.
- Cleaning takes care: harsh products or abrasive scrubbers can damage edges or backing over time.
- Not every space is ideal: high-impact zones, splash-heavy areas, and heavily textured walls need extra planning.
If you love the idea of a reflective statement wall and you’re willing to plan the layout carefully, mirror tiles can be a high-impact upgrade. If you want a surface that hides dust and requires zero upkeep, you may be happier with a different wall finish.
Where Mirror Tiles Look Best: Room-by-Room Design Ideas
Mirror tiles work best when they have something beautiful to reflect—natural light, a chandelier, a styled shelf, or a clean, balanced room layout. Here are a few spaces where mirror tiles for wall designs usually shine.
Living Room Feature Wall
A mirror tile feature wall can make a living room feel larger and brighter—especially when placed near a window. Consider installing it behind a console table, a sideboard, or a styled shelf wall so the reflection feels intentional.
- Best style pairing: warm wood, soft textiles, matte black accents, and layered lighting.
Entryway / Hallway Brightener
Hallways often lack natural light, which is exactly where mirror tiles can help. A partial mirror tile wall (like waist-height to eye-level) can deliver the brightening effect without turning the space into a full mirror corridor.
- Best style pairing: slim sconces, a small console, and a simple runner.
Dining Room “Statement” Wall
Dining rooms are made for drama. Beveled mirror tiles can sparkle under pendant lights, while antique or tinted mirror tiles can create a moody, upscale atmosphere that still feels warm and inviting.
- Best style pairing: brass or bronze lighting, darker paint tones, and natural stone décor.
Bathroom & Powder Room (Moisture Notes)
Mirror tiles can look incredible in a powder room, especially behind a vanity wall where you want depth and style. For bathrooms, the key is ventilation and smart placement. Avoid areas that get frequent direct splashes unless the tile type and installation method are appropriate for that exposure.
- Best style pairing: antique mirror accents with warm fixtures, or clean flat mirrors with modern lighting.
Home Bar / Entertainment Area
This is one of the most natural places for tinted or antique mirror tiles. Behind shelves or a bar setup, the reflection adds richness without feeling too bright. It’s a classic way to make a home bar area feel “finished.”
- Best style pairing: wood shelving, glassware, and warm LED lighting.
Before You Buy: Key Checks (So You Don’t Regret the Install)
A mirror tile wall looks best when you treat it like a real design project—not something you rush in an afternoon. A few quick checks can save you from a result that feels uneven, overly busy, or hard to maintain.
- Check wall flatness: use a level or straightedge. Even small bumps can cause visible distortion once tiles are installed.
- Test your lighting: mirror tiles look different in daylight vs. warm evening light. If possible, view a sample in the room.
- Decide how “tiled” you want it to feel: more seams/grout lines = more texture and pattern.
- Think about safety and placement: consider edges, corners, and high-traffic zones—especially in homes with kids or pets.
- Plan quantity carefully: measure your wall area and add extra for cuts and small breakage.
- Order a sample first: it’s the easiest way to confirm reflection, finish tone, and overall style.
Pro tip: If you’re unsure, start with a smaller feature section. A mirror tile panel can have the same “wow” factor as a full wall, with less risk and less maintenance.
Installation Overview: What to Expect (DIY vs Pro)
This isn’t a full installation tutorial, but it will help you understand what’s involved and whether a DIY approach makes sense for your project. Mirror tiles reward patience and careful layout—more than speed.
- Prep the wall: clean the surface, remove dust and residue, and correct uneven areas as much as possible.
- Plan the layout: mark a center line, dry-fit the pattern, and decide where cuts will land (especially around outlets and trim).
- Choose the right adhesive: use a mirror-safe option appropriate for your wall surface and tile type.
- Set tiles carefully: keep spacing consistent, avoid shifting, and clean any adhesive squeeze-out immediately.
- Grout if applicable: many mosaic layouts use grout; clean gently to avoid scratching and haze.
Common mistakes to avoid:
- Skipping wall prep and installing over uneven surfaces
- Starting from a corner instead of centering the design
- Using the wrong adhesive for mirror backing
- Rushing the cleanup and scratching the mirror surface
When to hire a pro: If your wall is large, your pattern is complex, you have many cuts to make, or you’re investing in a premium finish like beveled or antique mirror tile, professional installation can protect your result and reduce stress.
Care & Cleaning: Keep Mirror Tiles Looking New
Mirror tiles look their best when they stay crisp and clear. The good news: upkeep is easy when you keep it gentle and consistent.
- Use a soft microfiber cloth to remove dust and fingerprints.
- Choose non-abrasive cleaners and avoid harsh chemicals that may affect edges or backing.
- For mosaic styles, keep grout tidy and avoid soaking the surface with water.
- Make cleaning a quick habit—small wipes are easier than deep scrubbing later.
FAQ: Quick Answers About Mirror Tiles for Wall
Are mirror tiles for wall easy to install?
They can be, especially on flat walls with a simple grid layout. The hardest part is usually planning the layout and keeping everything aligned. If your wall has bumps, many corners, or lots of cutouts, installation becomes more challenging.
Do mirror tiles make a room look bigger?
They often do. Mirror tiles reflect light and create visual depth, which helps smaller rooms feel more open. Hallways, entryways, and compact dining areas tend to show the biggest difference.
Can mirror tiles be used in a bathroom?
Yes, especially in powder rooms. For full bathrooms, good ventilation matters, and placement is important. Avoid constant splash zones unless your tile type and installation method are designed for that environment.
Do mirror tiles require grout?
Some do, some don’t. Mirror mosaic sheets often use grout to complete the look, while certain larger mirror tiles may be installed with tight seams or minimal spacing depending on the product and style you choose.
Can you cut mirror tiles at home?
Cutting mirror glass takes care, the right tools, and safety precautions. If your project requires many cuts (especially around outlets or corners), hiring a professional can help reduce breakage and protect the finish.
What’s better: mirror mosaic sheets or individual mirror tiles?
Mosaic sheets are great for texture and smaller zones, and they can be easier to align as a sheet. Individual tiles give a cleaner, larger-scale look but may take more planning to keep seams consistent and balanced.
How do I choose between beveled vs flat mirror tiles?
Flat tiles give a cleaner, more modern reflection. Beveled tiles add sparkle and decorative depth. If you want the wall to feel like a design centerpiece, beveled can be a beautiful choice.
Are mirror tiles safe for homes with kids or pets?
They can be, but placement and product choice matter. Consider installing away from high-impact zones, choose quality materials, and ensure proper installation. If safety is a major concern, consult a pro and look for options suited to your household.
Conclusion: Choosing the Right Mirror Tiles for Wall (and Where to Shop)
The best mirror tile wall isn’t about copying a trend—it’s about choosing the right finish and format for your room. Start with the basics: pick the type that matches your style (flat, beveled, tinted, or mosaic), confirm your wall is smooth enough for a clean reflection, and plan a layout that feels balanced.
If you’re on the fence, order a sample and view it in your home’s lighting. That small step makes choosing easier and helps you feel confident before you commit to a full wall.
When you’re ready to move from ideas to action, explore mirror tile styles and curated options at Pebble Tile Shop. Whether you’re building a bold accent wall or adding a reflective touch to a smaller space, you can shop thoughtfully and choose a look that feels right for your home.

Leave a comment
This site is protected by hCaptcha and the hCaptcha Privacy Policy and Terms of Service apply.