
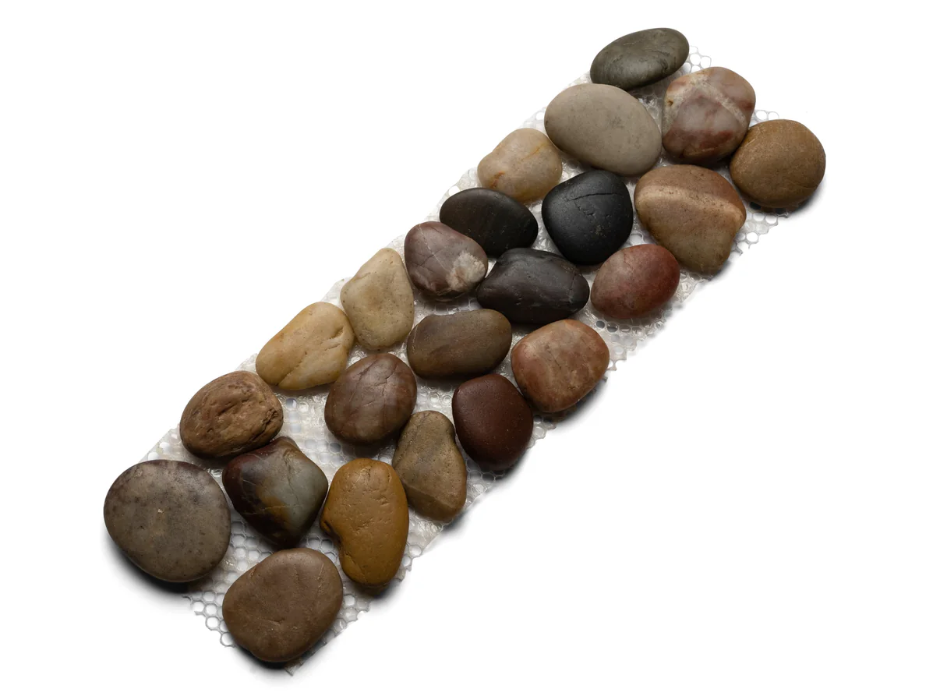
Installing pebble tile borders can dramatically enhance the aesthetics of your patio, garden pathway, or bathroom. At Pebble Tile Shop, we offer high-quality polished pebbles and border tiles that provide both elegance and durability. However, improper installation can lead to uneven surfaces, cracked grout, and reduced tile lifespan. In this guide, we cover 7 common mistakes to avoid during pebble tile installation, step-by-step tips, and techniques to achieve a flawless finish.
Why Choose Pebble Tile Borders?
Pebble tile borders are decorative accents that enhance the visual appeal of any tiled surface. Whether used along shower floors, patio edges, or garden walkways, these borders provide:
-
Aesthetic Enhancement: Create clean edges and a polished, professional look.
-
Texture and Dimension: Pebbles add tactile and visual interest.
-
Durability: High-quality tiles resist moisture, temperature changes, and wear.
-
Versatility: Suitable for indoor and outdoor applications, including bathrooms and patios.
Explore our full range of pebble tile borders for ideas and design inspiration.
Common DIY Mistakes When Installing Pebble Tile Borders
Avoiding these mistakes ensures your tile borders remain durable and visually appealing.
1. Skipping Proper Surface Preparation
A clean, level surface is critical. Uneven or dirty surfaces can lead to poor adhesion and cracked tiles. Always:
-
Remove dust, grease, and old adhesive.
-
Level the surface with cement backer boards or mortar if necessary.
-
Ensure proper drainage in wet areas like showers.
2. Incorrect Tile Layout
Planning the layout prevents awkward cuts and uneven grout lines. Tips include:
-
Dry-lay tiles before installing to visualize placement.
-
Center the border to create symmetry.
-
Consider the pattern and direction of pebble alignment.
3. Using the Wrong Tile Adhesive
Tile adhesive must match the surface type and pebble weight. Mistakes include using adhesive for wall tiles on floors or vice versa. Recommendations:
-
Use exterior-grade adhesive for outdoor areas.
-
Use water-resistant adhesive in wet areas like showers.
-
Apply adhesive evenly to avoid lippage or hollow spots.
4. Improper Grout Application
Grout fills the spaces between pebbles but mistakes can compromise durability:
-
Avoid using too much water when mixing grout to prevent shrinkage.
-
Ensure grout penetrates all gaps between pebbles.
-
Clean excess grout quickly to prevent staining.
5. Neglecting Sealing of Pebble Tiles
Sealing is critical to maintain color, prevent staining, and protect against moisture. Steps:
-
Apply a high-quality sealer compatible with natural stones.
-
Seal after grout cures.
-
Reapply sealer annually for high-traffic or wet areas.
6. Cutting Pebbles Incorrectly
Improper cutting can damage tiles or leave uneven edges. Use proper tools:
-
Wet saws with diamond blades for precise cuts.
-
Snap cutters for smaller adjustments.
-
Avoid hammering tiles into place.
7. Ignoring Expansion Joints
Pebble tile borders expand and contract with temperature changes. Skipping expansion joints can lead to cracking:
-
Include joints around perimeter edges.
-
Use flexible caulk in wet areas like showers or outdoor patios.
Step-by-Step Installation Guide for Pebble Tile Borders
Follow these steps to install pebble tile borders successfully:
-
Prepare the Surface: Clean, level, and prime the area.
-
Dry Layout: Lay out tiles to visualize spacing and pattern.
-
Apply Adhesive: Spread evenly with a notched trowel.
-
Set Tiles: Press tiles firmly, adjusting alignment as needed.
-
Grout: Fill all gaps and remove excess immediately.
-
Seal: After grout dries, apply a protective sealer.
-
Inspect: Check for uneven spots or loose tiles.
Tips for Grout Lines and Tile Adhesive
-
Keep grout lines consistent for a professional finish. Use spacers to maintain even gaps.
-
Mix adhesive and grout according to manufacturer instructions.
-
Avoid over-troweling adhesive to prevent air pockets beneath the tiles.
Using Pebble Tile Borders Outdoors
Pebble tile borders are ideal for patios, garden pathways, and pool decks:
-
Durability: Resistant to weather and UV exposure.
-
Design Flexibility: Can combine with large tiles, concrete, or natural stone slabs.
-
Safety: Textured surface reduces slipping hazards in wet areas.
Check out our Shipping Information for-delivery options if installing outdoors.
Shower Floor Tile Guide with Pebble Tile Borders
Pebble tiles are perfect for shower floors due to their slip-resistant texture. Installation tips include:
-
Use a waterproof membrane beneath tiles.
-
Maintain a slight slope for proper drainage.
-
Grout fully between pebbles to prevent water infiltration.
-
Seal thoroughly to prevent staining and mold growth.
Creative Design Ideas for Pebble Tile Borders
-
Contrasting Edges: Use darker pebbles around light-colored floor tiles for a framed effect.
-
Mosaic Inserts: Combine multiple colors or sizes of pebbles for artistic accents.
-
Outdoor Patio Borders: Outline patio areas with pebble tile borders for a clean, polished look.
Maintenance Tips for Pebble Tile Borders
-
Sweep or vacuum regularly to remove dirt and debris.
-
Wash periodically with a mild detergent and soft brush.
-
Avoid harsh chemicals that may damage grout or pebble surfaces.
-
Reapply sealer annually for high-traffic or wet areas.
Conclusion
Installing pebble tile borders adds elegance and texture to any tiled surface, whether indoors or outdoors. Avoiding common mistakes such as improper surface preparation, incorrect adhesive use, or poor grout application ensures a perfect, long-lasting finish. Following step-by-step installation techniques, sealing, and regular maintenance guarantee that your pebble tile borders remain beautiful for years.

Leave a comment
This site is protected by hCaptcha and the hCaptcha Privacy Policy and Terms of Service apply.